Epsio Deployment Guide
This guide will walk you through the process of deploying Epsio for PostgreSQL in your AWS environment.
Before you begin
Before proceeding with the deployment guide, ensure that you have the following:
- Terraform installed.
- A PostgreSQL Database with version 10+.
- An account
access_tokenwhich can be retrieved from the cloud console settings page.
1. Prepare your database for Epsio
This step will walk you through setting up your database to allow Epsio to connect to it. In this step, you will create a user Epsio can use, as well as a schema Epsio will create procedures/functions in. In step 3, you will supply Epsio with the password you created for the Epsio user.
Open a connection to your database and follow the steps below.
Create a schema for Epsio's metadata:
Create a database user for Epsio's exclusive use:
Replace secret with a strong password
Grant user permissions
Grant the epsio_user access to the epsio schema:
GRANT USAGE ON SCHEMA epsio TO epsio_user;
GRANT CREATE ON SCHEMA epsio TO epsio_user;
GRANT ALL PRIVILEGES ON ALL TABLES IN SCHEMA epsio TO epsio_user;
epsio_user read-only access to all tables in your schema by running the following commands: GRANT SELECT ON ALL TABLES IN SCHEMA public TO epsio_user;
ALTER DEFAULT PRIVILEGES IN SCHEMA public GRANT SELECT ON TABLES TO epsio_user;
GRANT CREATE, USAGE ON SCHEMA public TO epsio_user;
If you plan to access schemas other than the public schema, you'll need to run these commands for each schema.
Replace public with the name of your schema.
Continue to the next step to configure logical replication.
2. Configure logical replication
2.1 Check if logical replication is enabled
Run the following command to check if your instance is already configured with logical replication:
postgres> SHOW rds.logical_replication;
 rds.logical_replication
-------------------------
 off
(1 row)
on (or 1), it means that logical replication is enabled, skip to set up replication.If not, follow the steps below to enable logical replication.
2.2 Enable logical replication
Create a custom RDS parameter group. If your instance already uses a custom parameter group, skip to the next stage.
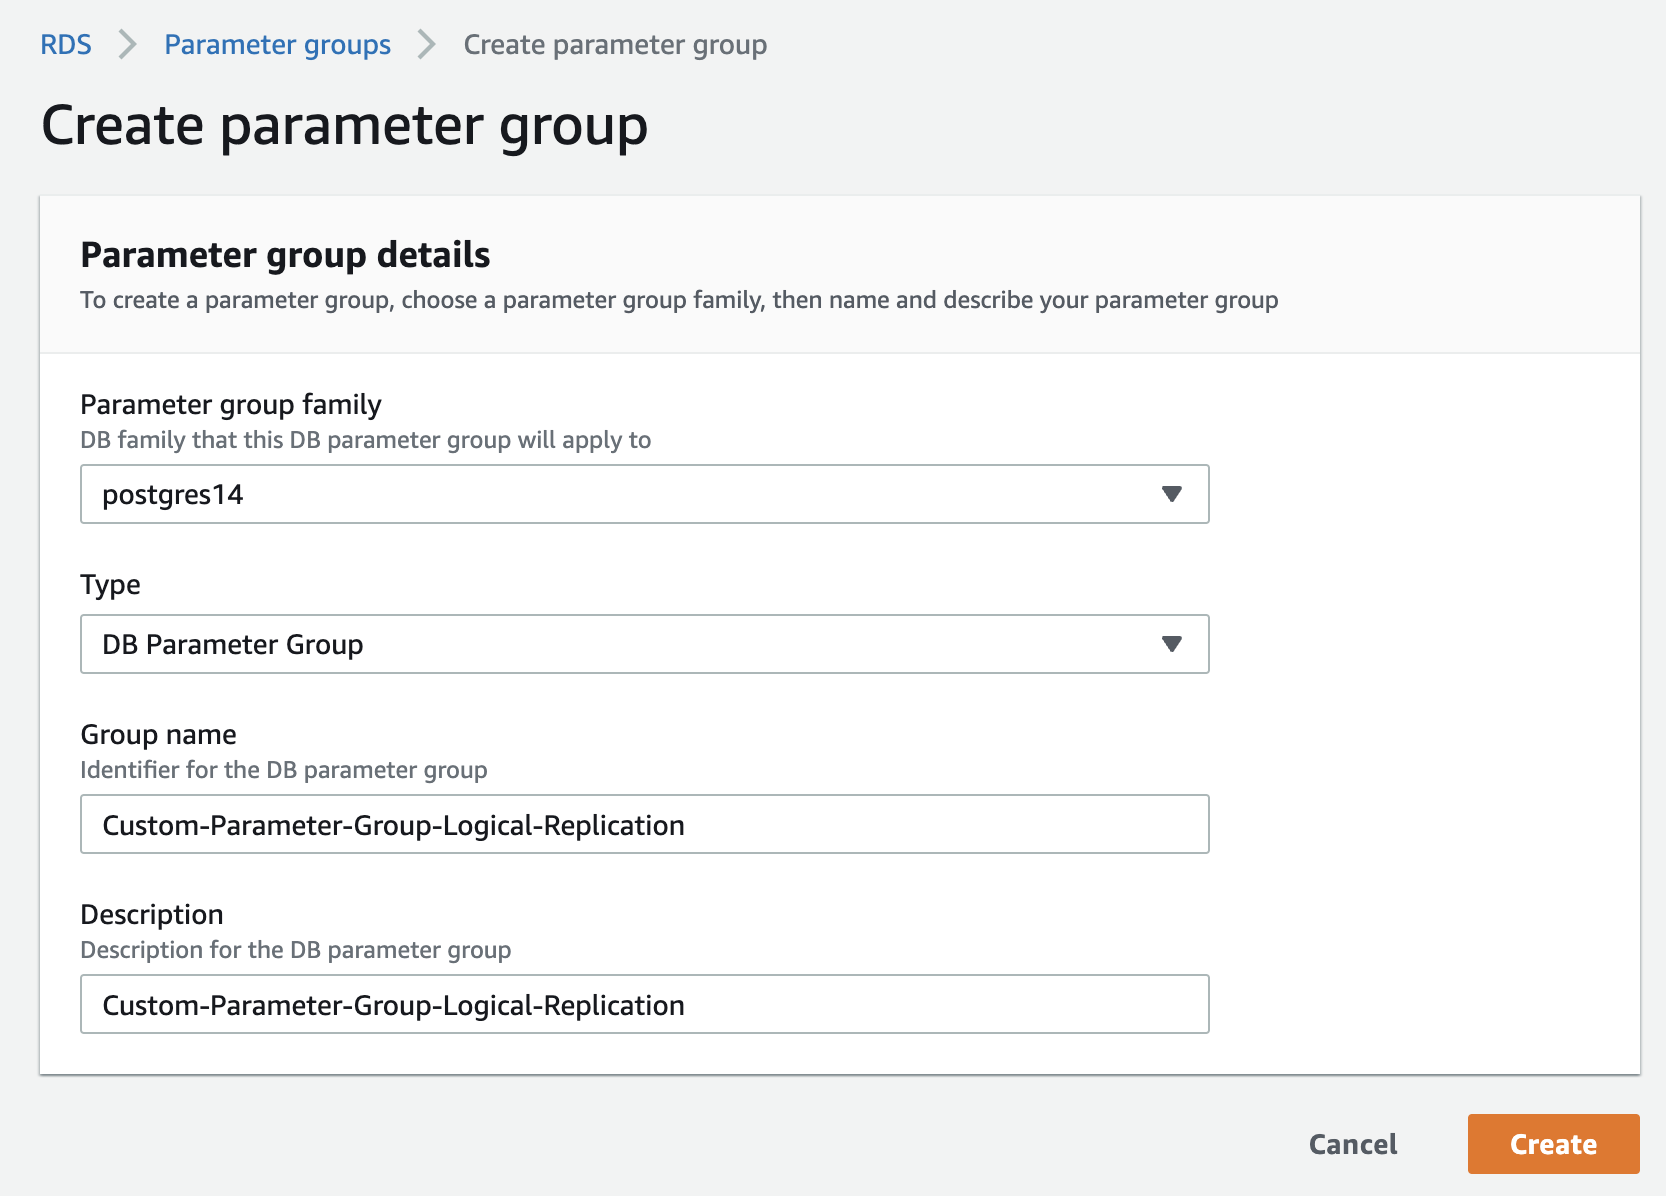
Edit the custom parameter group. set the rds.logical_replication parameter to 1.

Optional: Set the max_slot_wal_keep_size parameter to 51200 to limit the amount of WAL data that is retained for logical replication slots. (Postgres 13+)
Associate the custom parameter group with your RDS instance. Go to the RDS management console, select your instance and click on the "Modify" button.
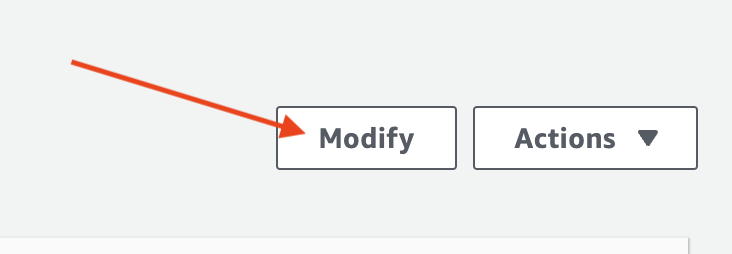
In the "Modify DB Instance" page, select the custom parameter group you created in the previous step.

Make sure you choose "Apply Immediately" to apply the changes immediately.
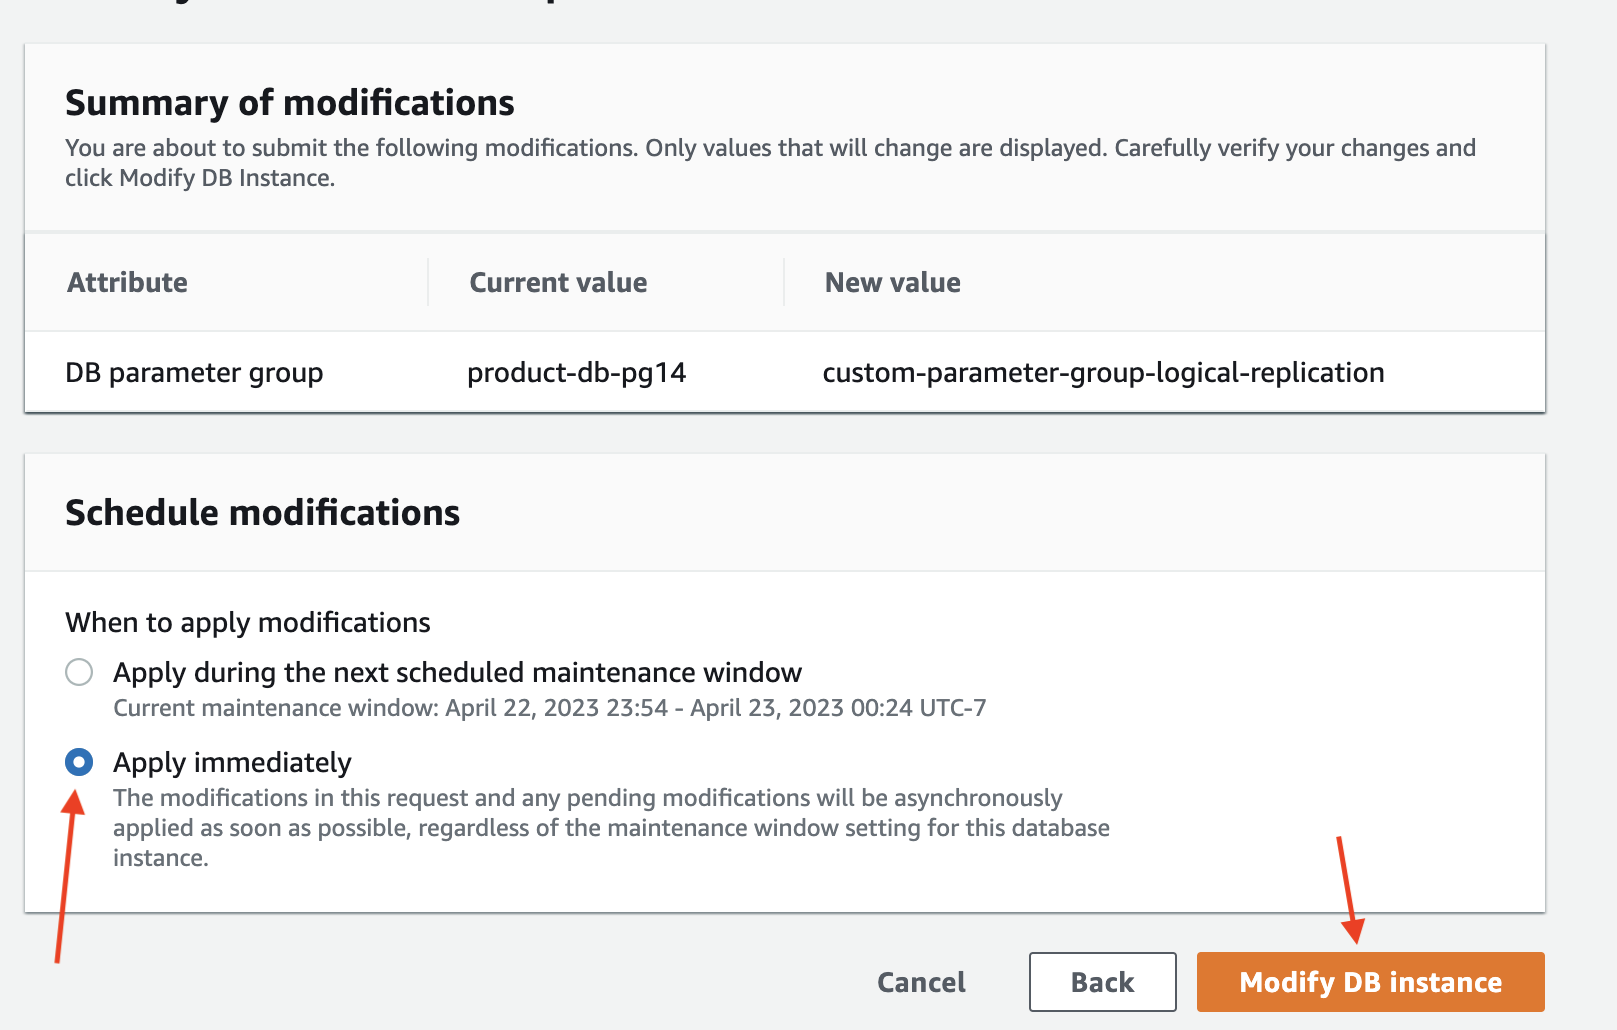
Wait for the parameter group configuration to change to "Pending reboot" status.
The parameter group status can be found in the "Configuration" tab of your RDS instance. 

Then, reboot the database for the changes to take effect.
You'll know that the changes have taken affect when the status of your DB instance Parameter Group changes to "In Sync".

Verify that the rds.logical_replication parameter is set to "on" (or 1).
Create a custom Aurora parameter group. If your instance already uses a custom parameter group, skip to the next stage.
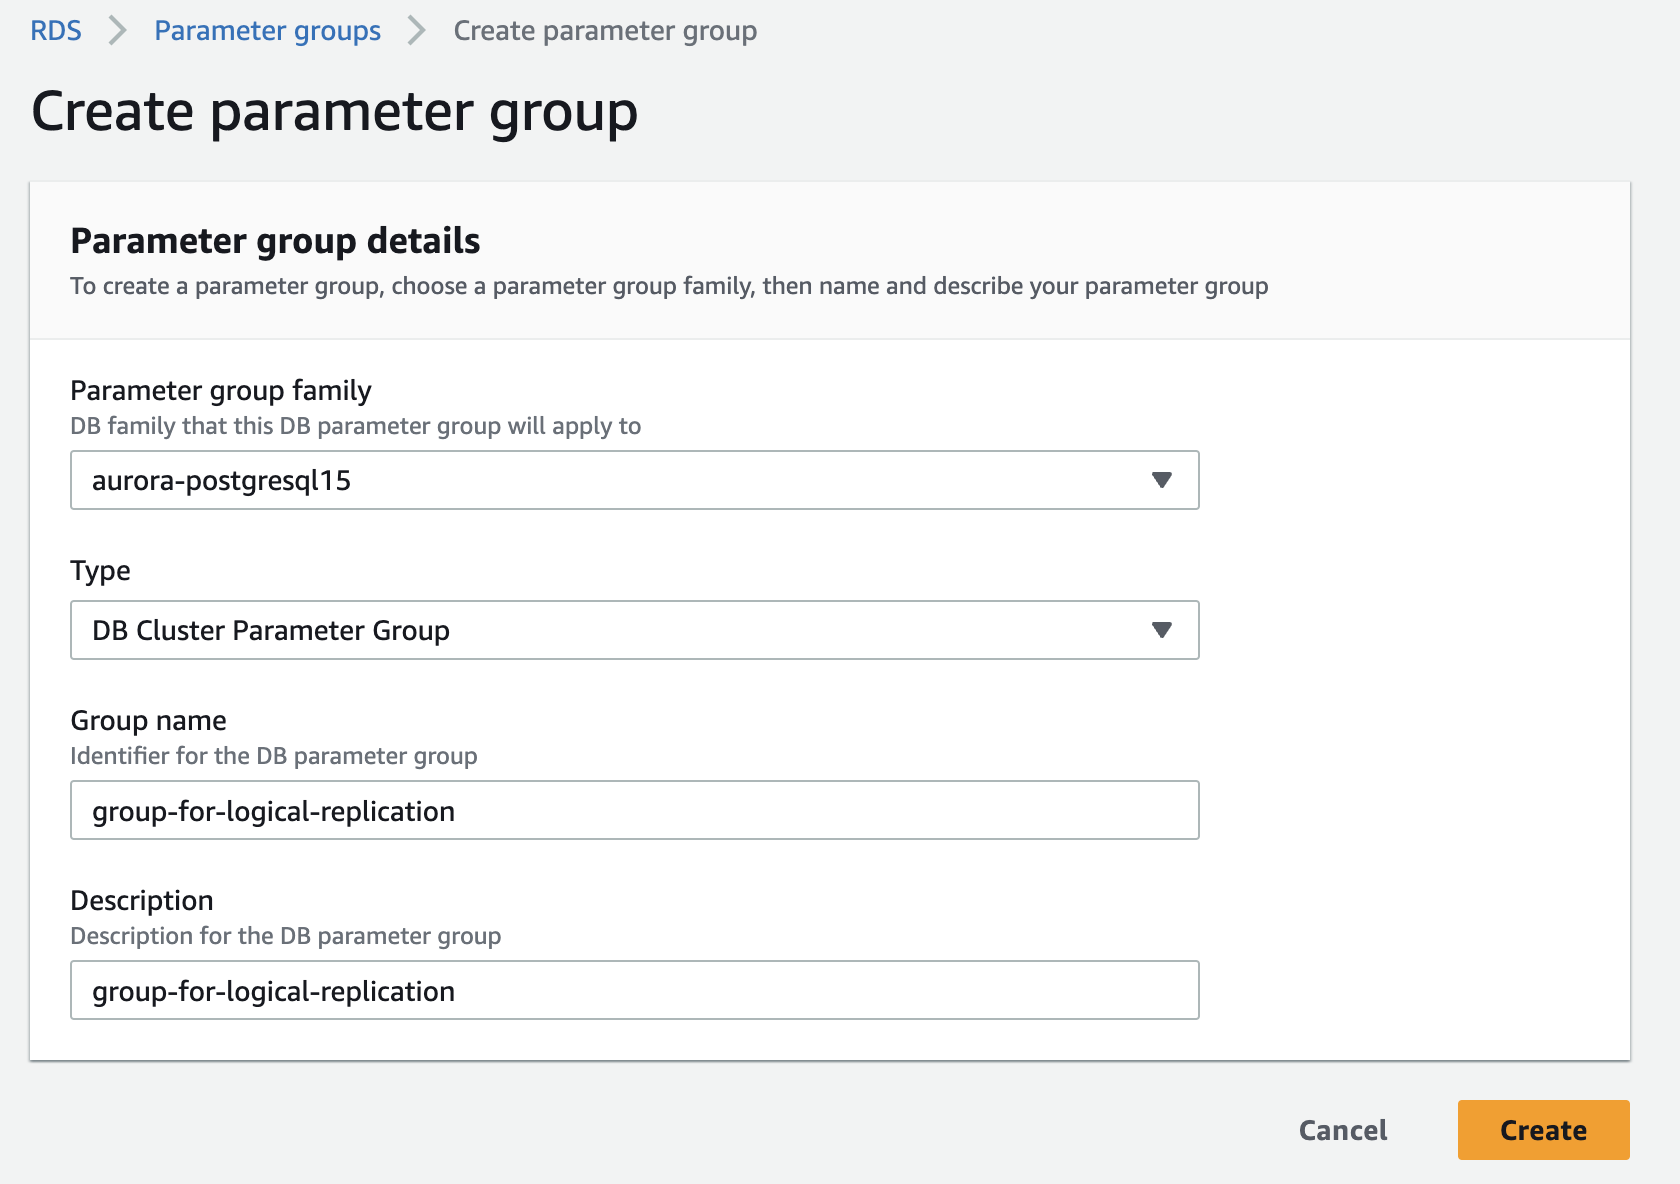
Edit the custom parameter group, set the rds.logical_replication parameter to 1.

Optional: Set the max_slot_wal_keep_size parameter to 51200 to limit the amount of WAL data that is retained for logical replication slots. (Postgres 13+)
Associate the custom parameter group with your Aurora cluster. Go to the RDS management console, select your instance and click on the "Modify" button.

In the "Modify DB Instance" page, select the custom parameter group you created in the previous step.

Make sure you choose "Apply Immediately" to apply the changes immediately.
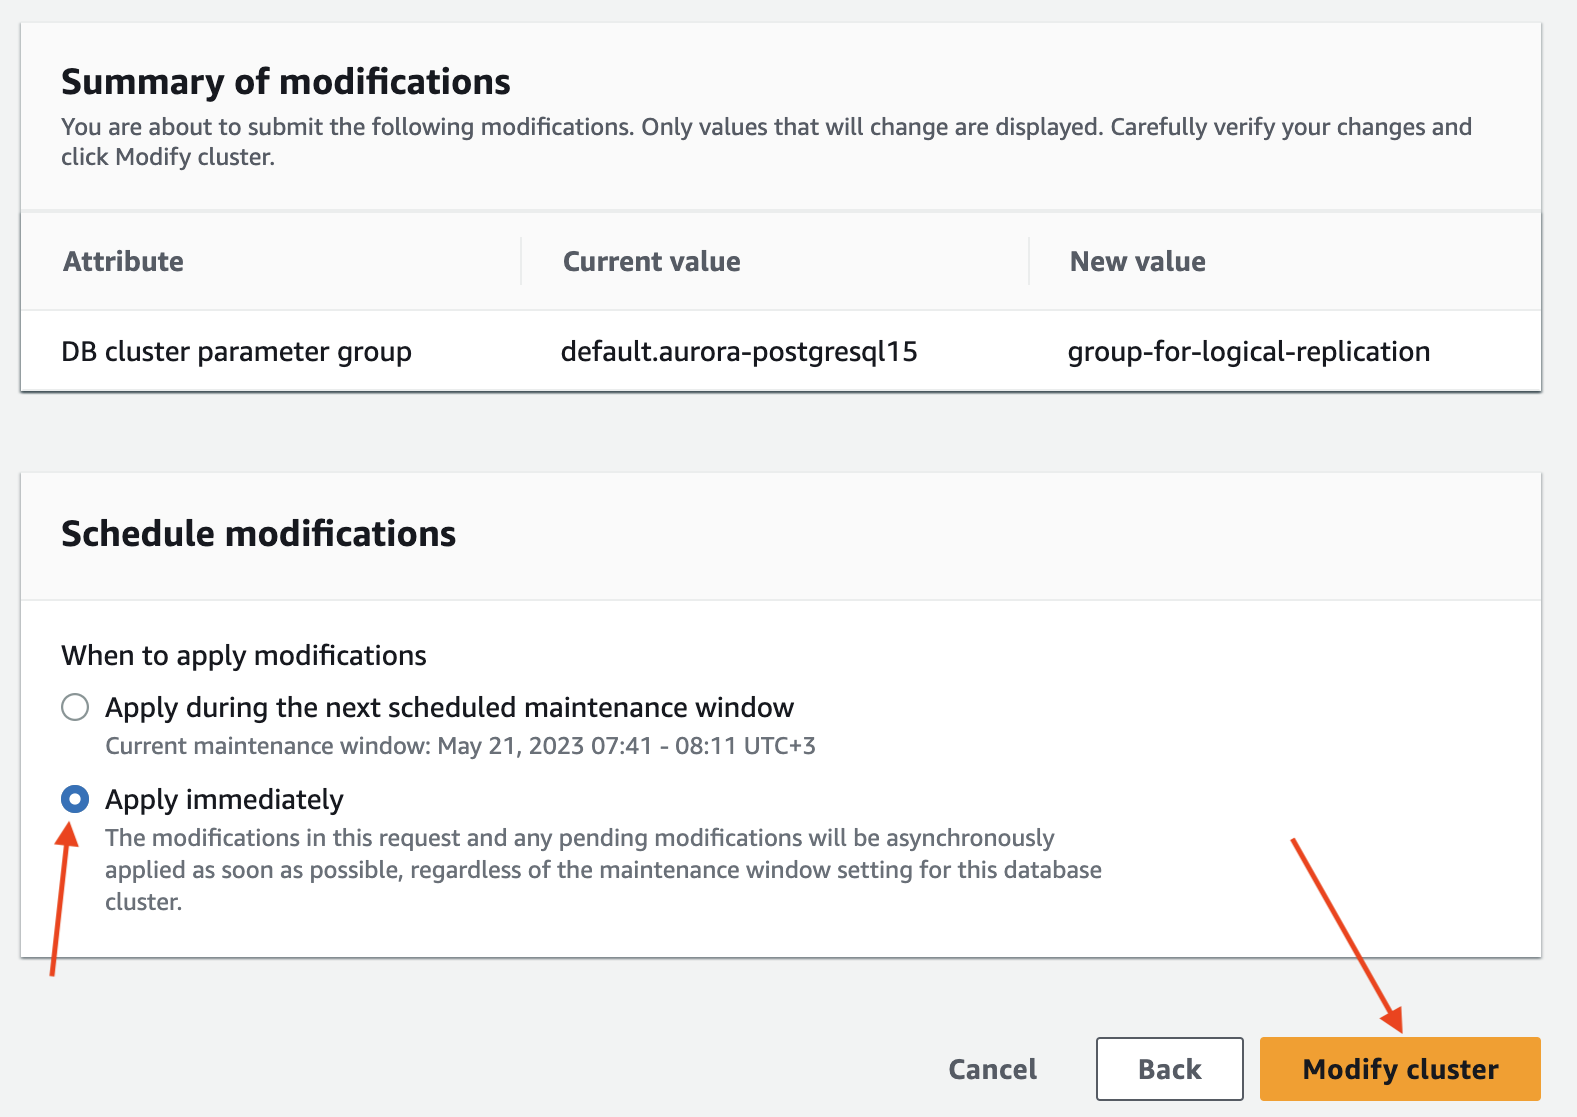
Wait for the parameter group configuration to change to "Pending reboot" status.
The parameter group status can be found in the "Configuration" tab of your RDS instance. 

Then, reboot the database for the changes to take effect.
You'll know that the changes have taken affect when the status of your DB instance Parameter Group changes to "In Sync".

Verify that the rds.logical_replication parameter is set to "on" (or 1).
To enable logical replication in a PostgreSQL database, you need to set the wal_level parameter in your database configuration to logical. For standard PostgreSQL installations, you can do this by either:
- Method 1: Adding a
wal_level = logicalline to thepostgresql.conffile. - Method 2: Running
ALTER SYSTEM SET wal_level = logical;;
Optional: Set the max_slot_wal_keep_size parameter to 51200 to limit the amount of WAL data that is retained for logical replication slots. (Postgres 13+)
Restart your database for the changes to take effect.
Verify that the wal_level parameter is set to "logical".
2.3 Set up replication
Next, you'll need to set up replication by running the following commands in your database:
3. Install Epsio
To install Epsio, run the following commands in your VM:
export DB_HOST='YOUR_DB_HOST'
export DB_NAME='YOUR_DB_NAME'
export EPSIO_USER_PASSWORD='<The password you created in step 1>'

curl https://epsio.storage.googleapis.com/<VERSION>/install.sh | \
    VERSION=<VERSION> TOKEN=<YOUR_TOKEN> bash -s -- \
    --db-type=postgres \
    --db-host=$DB_HOST \
    --db-port=5432 \
    --db-password=$EPSIO_USER_PASSWORD \
    --db-name=$DB_NAME
Once Epsio successfully installs, you'll be redirected to the Epsio dashboard.
Any errors/warnings in connecting to your database can be viewed in the Epsio dashboard.
You are set to go and can create your first view. Visit the create_view for further details.
- A MySQL Database with version 5.7+.
- Your account's
access_tokenwhich can be retrieved from the cloud console settings page. - Your account ID (contact support to receive your account id).
1. Launch Epsio in your environment using Terraform
Define the Epsio AMI:
data "aws_ami" "epsio_prod" {
  most_recent = true
  # Epsio AWS account ID
  owners = ["262744063927"]
  filter {
    name   = "name"
    values = ["epsio-prod"]
  }
}
Define the Epsio account id & token variables to be later used:
After defining the above variables, add the Epsio account id & token to your terraform environment variables.
Info
- Your account token can be found in the Epsio cloud console settings page.
- Your account ID can be received upon contacting Epsio support.
Create an instance from AMI (with an EBS volume)
To create an Epsio instance from the AMI, use the following configuration template:
resource "aws_instance" "epsio_instance" {
  ami           = data.aws_ami.epsio_prod.id

  instance_type = "m6g.2xlarge"  # Lightweight
# instance_type = "m6g.4xlarge"  # Medium
# instance_type = "m6g.8xlarge"  # Power

  root_block_device {
    volume_type = "standard"
    volume_size = 64
    delete_on_termination = true
  }

  ebs_block_device {
    device_name = "/dev/xvda"
    volume_type = "gp2"
    volume_size = 512 # 500GB -- replace if needed
    delete_on_termination = true
  }

  user_data = <<-EOF
                #!/bin/bash
                curl -s https://storage.googleapis.com/epsio/init_ec2.sh | sudo ACCOUNT_ID=${var.epsio_account_id} TOKEN=${var.epsio_token} DATABASE_TYPE=mysql bash
              EOF

  lifecycle {
    ignore_changes = [ami]
  }

  vpc_security_group_ids = [aws_security_group.epsio_sg.id] # Replace me
  subnet_id     = aws_subnet.epsio_subnet.id                # Replace me


  # -- Add more configurations here
}
Warning
Make sure to have the lifecycle block in the instance configuration to prevent the instance from being replaced when the AMI changes.:
Note
For reference, download a full example terraform script of a complete Epsio setup on a new VPC.
After you spin up the EC2, you should see the new deployment in your Epsio cloud console to further configure.
2. Connect Epsio to your database
Open a connection to your database and follow the steps below.
Create a database for Epsio's metadata:
Create a database user for Epsio's exclusive use:
Grant new user permissions to the Epsio database
Grant replication permissions to the Epsio user
Grant permission to create result tables and populate existing data
GRANT SELECT, CREATE, SHOW VIEW, CREATE VIEW, ALTER, INSERT, LOCK TABLES, DELETE, DROP ON *.* TO epsio_user;
If you wish to limit access to only specific tables / databases, replace the *.* pattern with the relevant database names and table names you intend on using.
Enter the credentials of the epsio user you've just created in the wizard and click connect:
You will also need to provide the hostname (or IP address), port and a default database name (the default database that Epsio will create result tables in or query from).
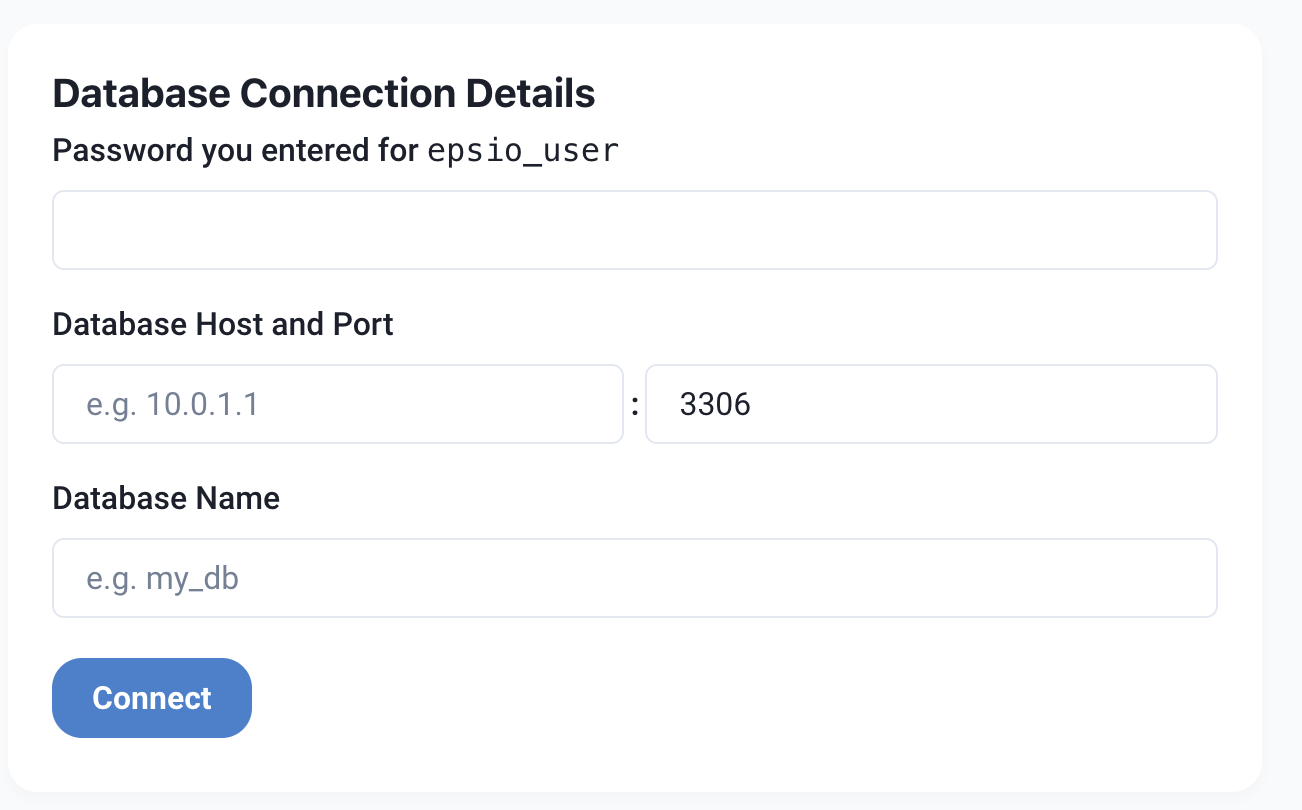
After connection, Epsio will check that your database is configured correctly and will create the functions under the epsio database.
Continue to the next step to configure binlog.
3. Configure Replication
3.1 Check if replication is configured correctly
Run the following command to check if your instance is already configured correctly:
3.2 Enable replication
Create a custom RDS parameter group. If your instance already uses a custom parameter group, skip to the next stage.
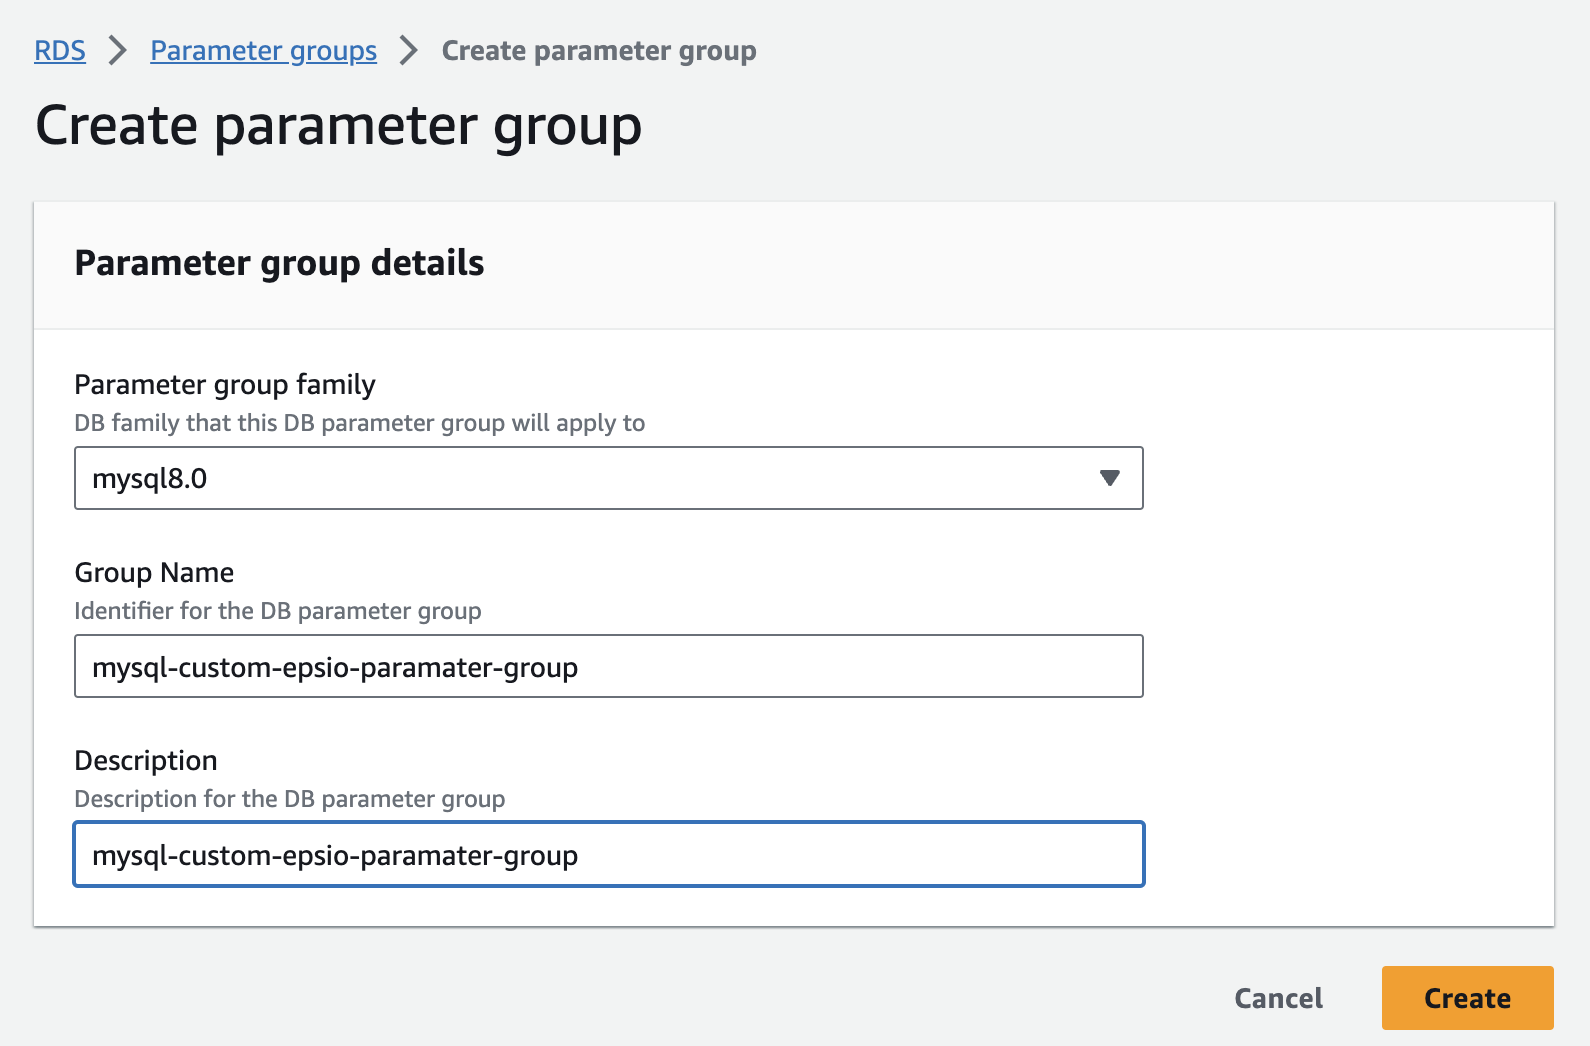
Edit the custom parameter group.
Set binlog_format parameter to "ROW". 
Set log_bin_trust_function_creators to 1. 
Associate the custom parameter group with your RDS instance. Go to the RDS management console, select your instance and click on the "Modify" button.

In the "Modify DB Instance" page, select the custom parameter group you created in the previous step.

Make sure you choose "Apply Immediately" to apply the changes immediately.

Wait for the parameter group configuration to change to "Pending reboot" status.
The parameter group status can be found in the "Configuration" tab of your RDS instance. 

Then, reboot the database for the changes to take effect.
You'll know that the changes have taken affect when the status of your DB instance Parameter Group changes to "In Sync".

After the instance reboots, edit the RDS retention policy:
Verify that all the new configurations are enabled by running the following commands:Create a custom Aurora cluster parameter group. If your instance already uses a custom cluster parameter group, skip to the next stage.
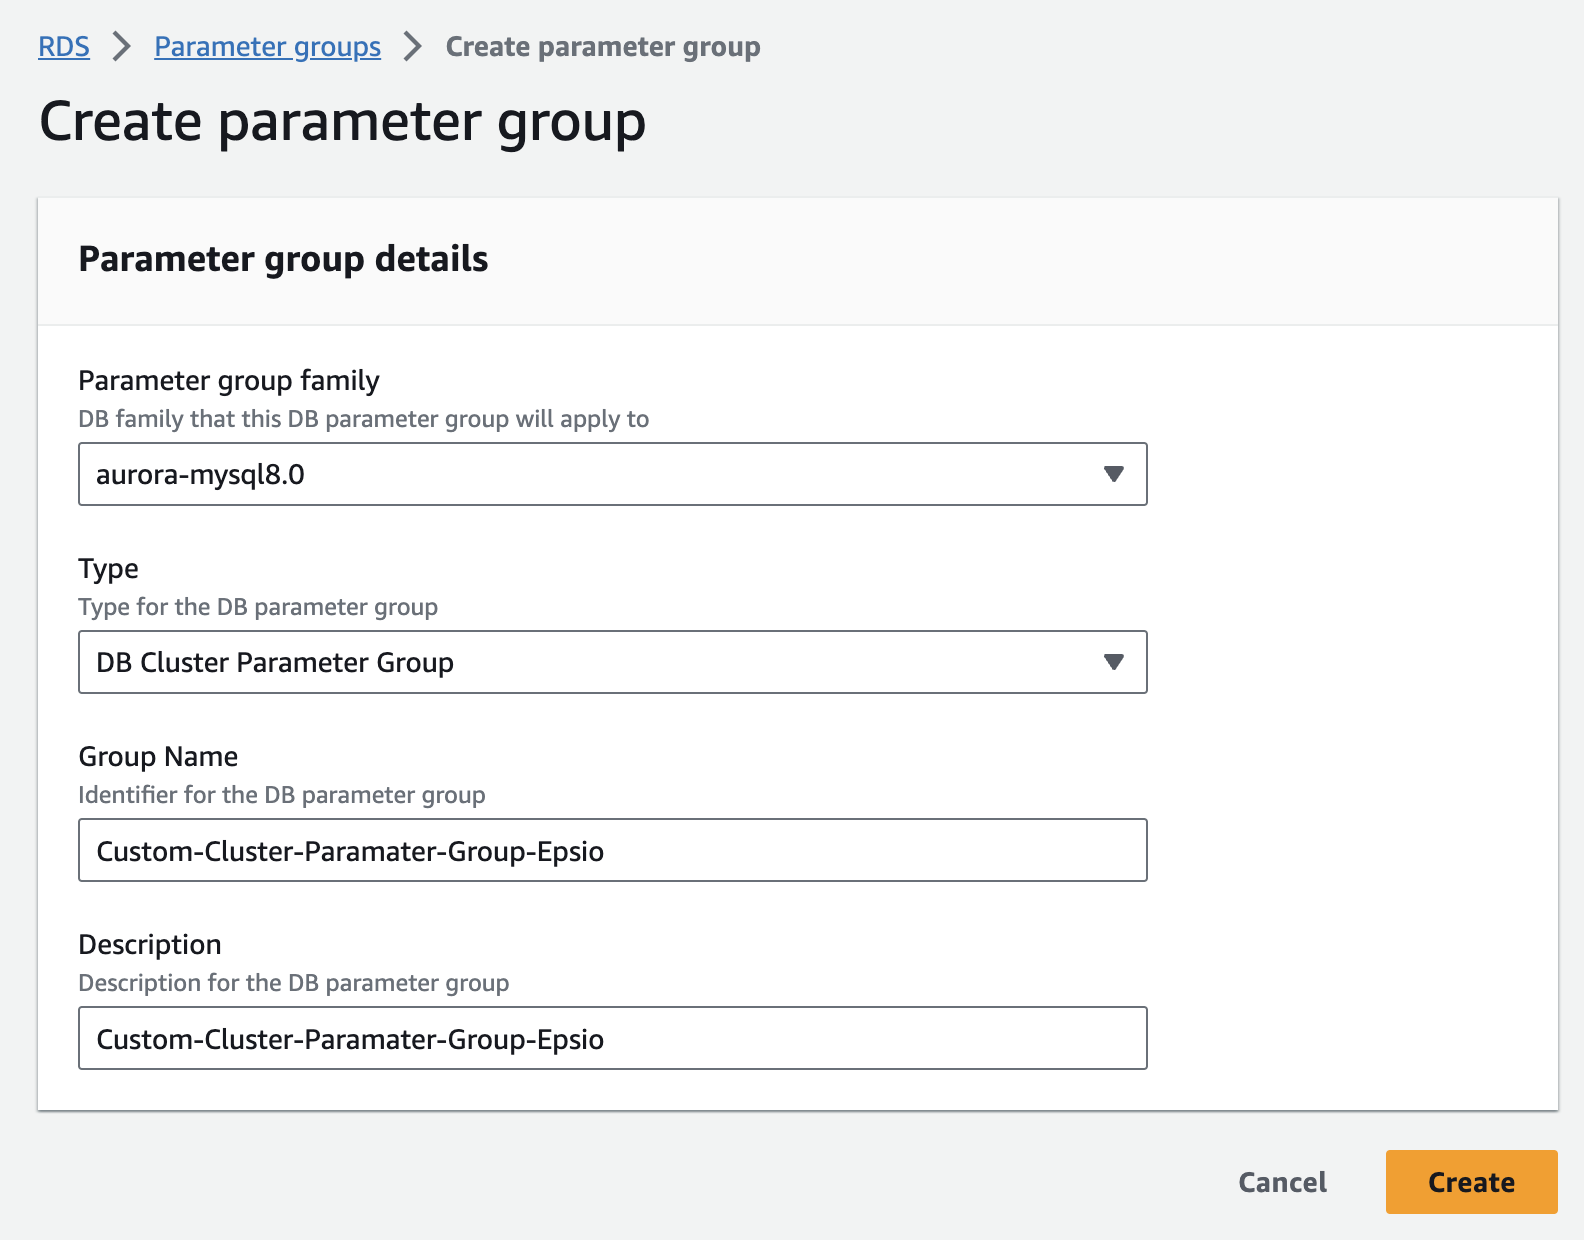
Edit the custom aurora parameter group.
Set binlog_format parameter to "ROW". 
Set log_bin_trust_function_creators to 1. 
Associate the custom cluster parameter group with your Aurora cluster. Go to the RDS management console, select your cluster and click on the "Modify" button.

In the "Modify DB Cluster" page, select the custom parameter group you created in the previous step.

Make sure you choose "Apply Immediately" to apply the changes immediately.
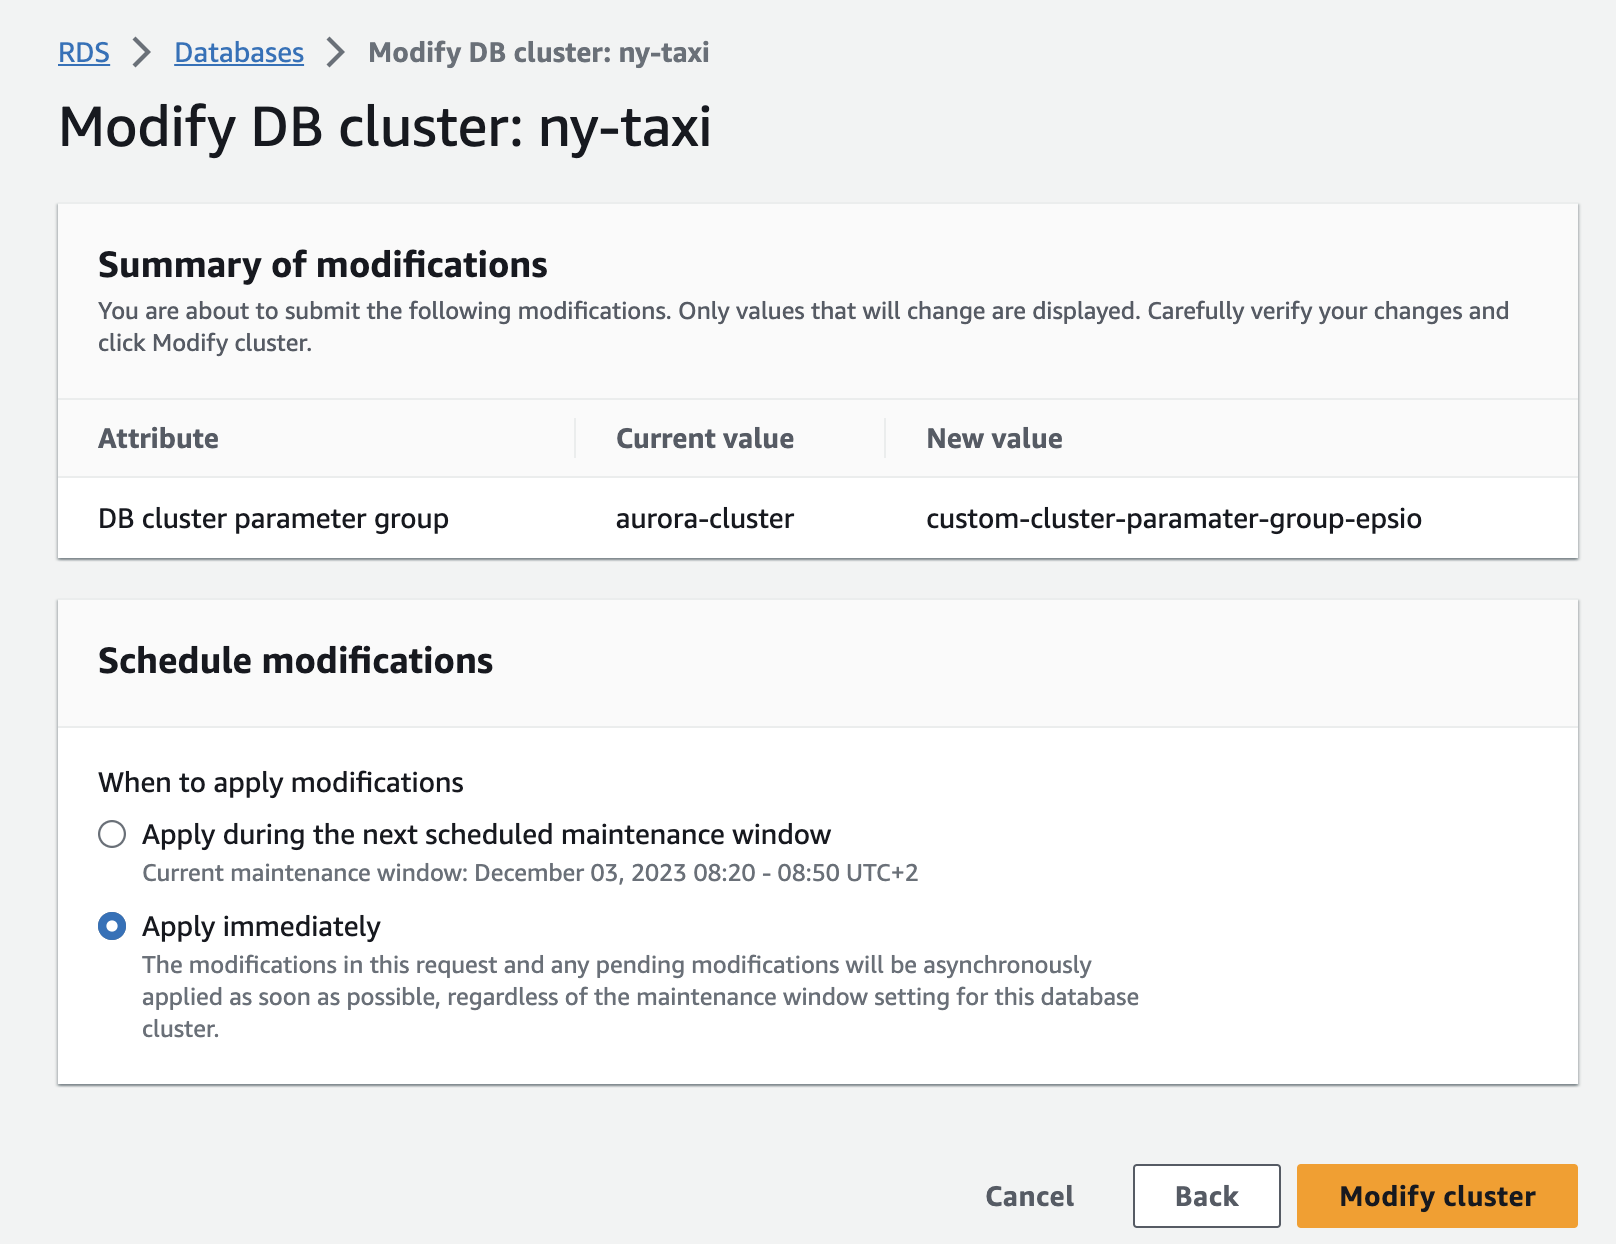
Wait for the parameter group configuration to change to "Pending reboot" status in your Aurora instance.
The parameter group status can be found in the "Configuration" tab of your Aurora instance. 
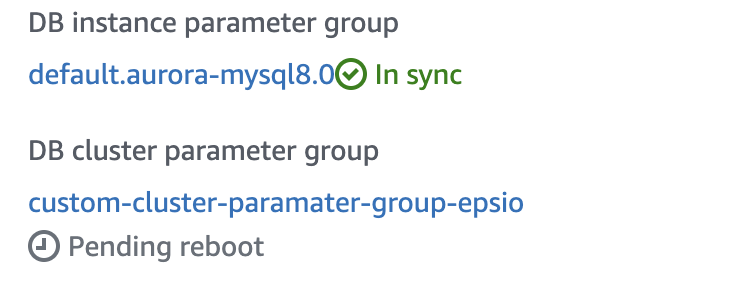
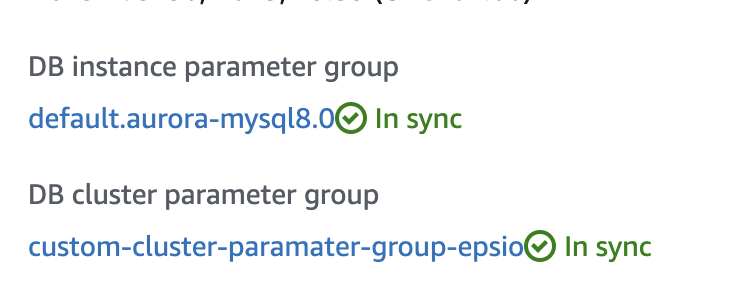
Then, reboot the Aurora instance for the changes to take effect.
You'll know that the changes have taken affect when the status of your Aurora instance cluster parameter group changes to "In Sync".
After the instance reboots, edit the Aurora retention policy:
Verify that all the new configurations are enabled by running the following commands:Enable binlog:
Edit your mysql conf file and add the following configurations:
server-id = 223344
log_bin = mysql-bin
binlog_format = ROW
binlog_row_image = FULL
binlog_expire_logs_seconds  = 864000
Enable log_bin_trust_function_creators: Run the following command;
Validate configuration: Verify that all the new configurations are enabled by running the following commands:
3.3 Finish the deployment
Once finished, click on the "Validate Configuration" and Epsio will verify that replication is set up correctly.
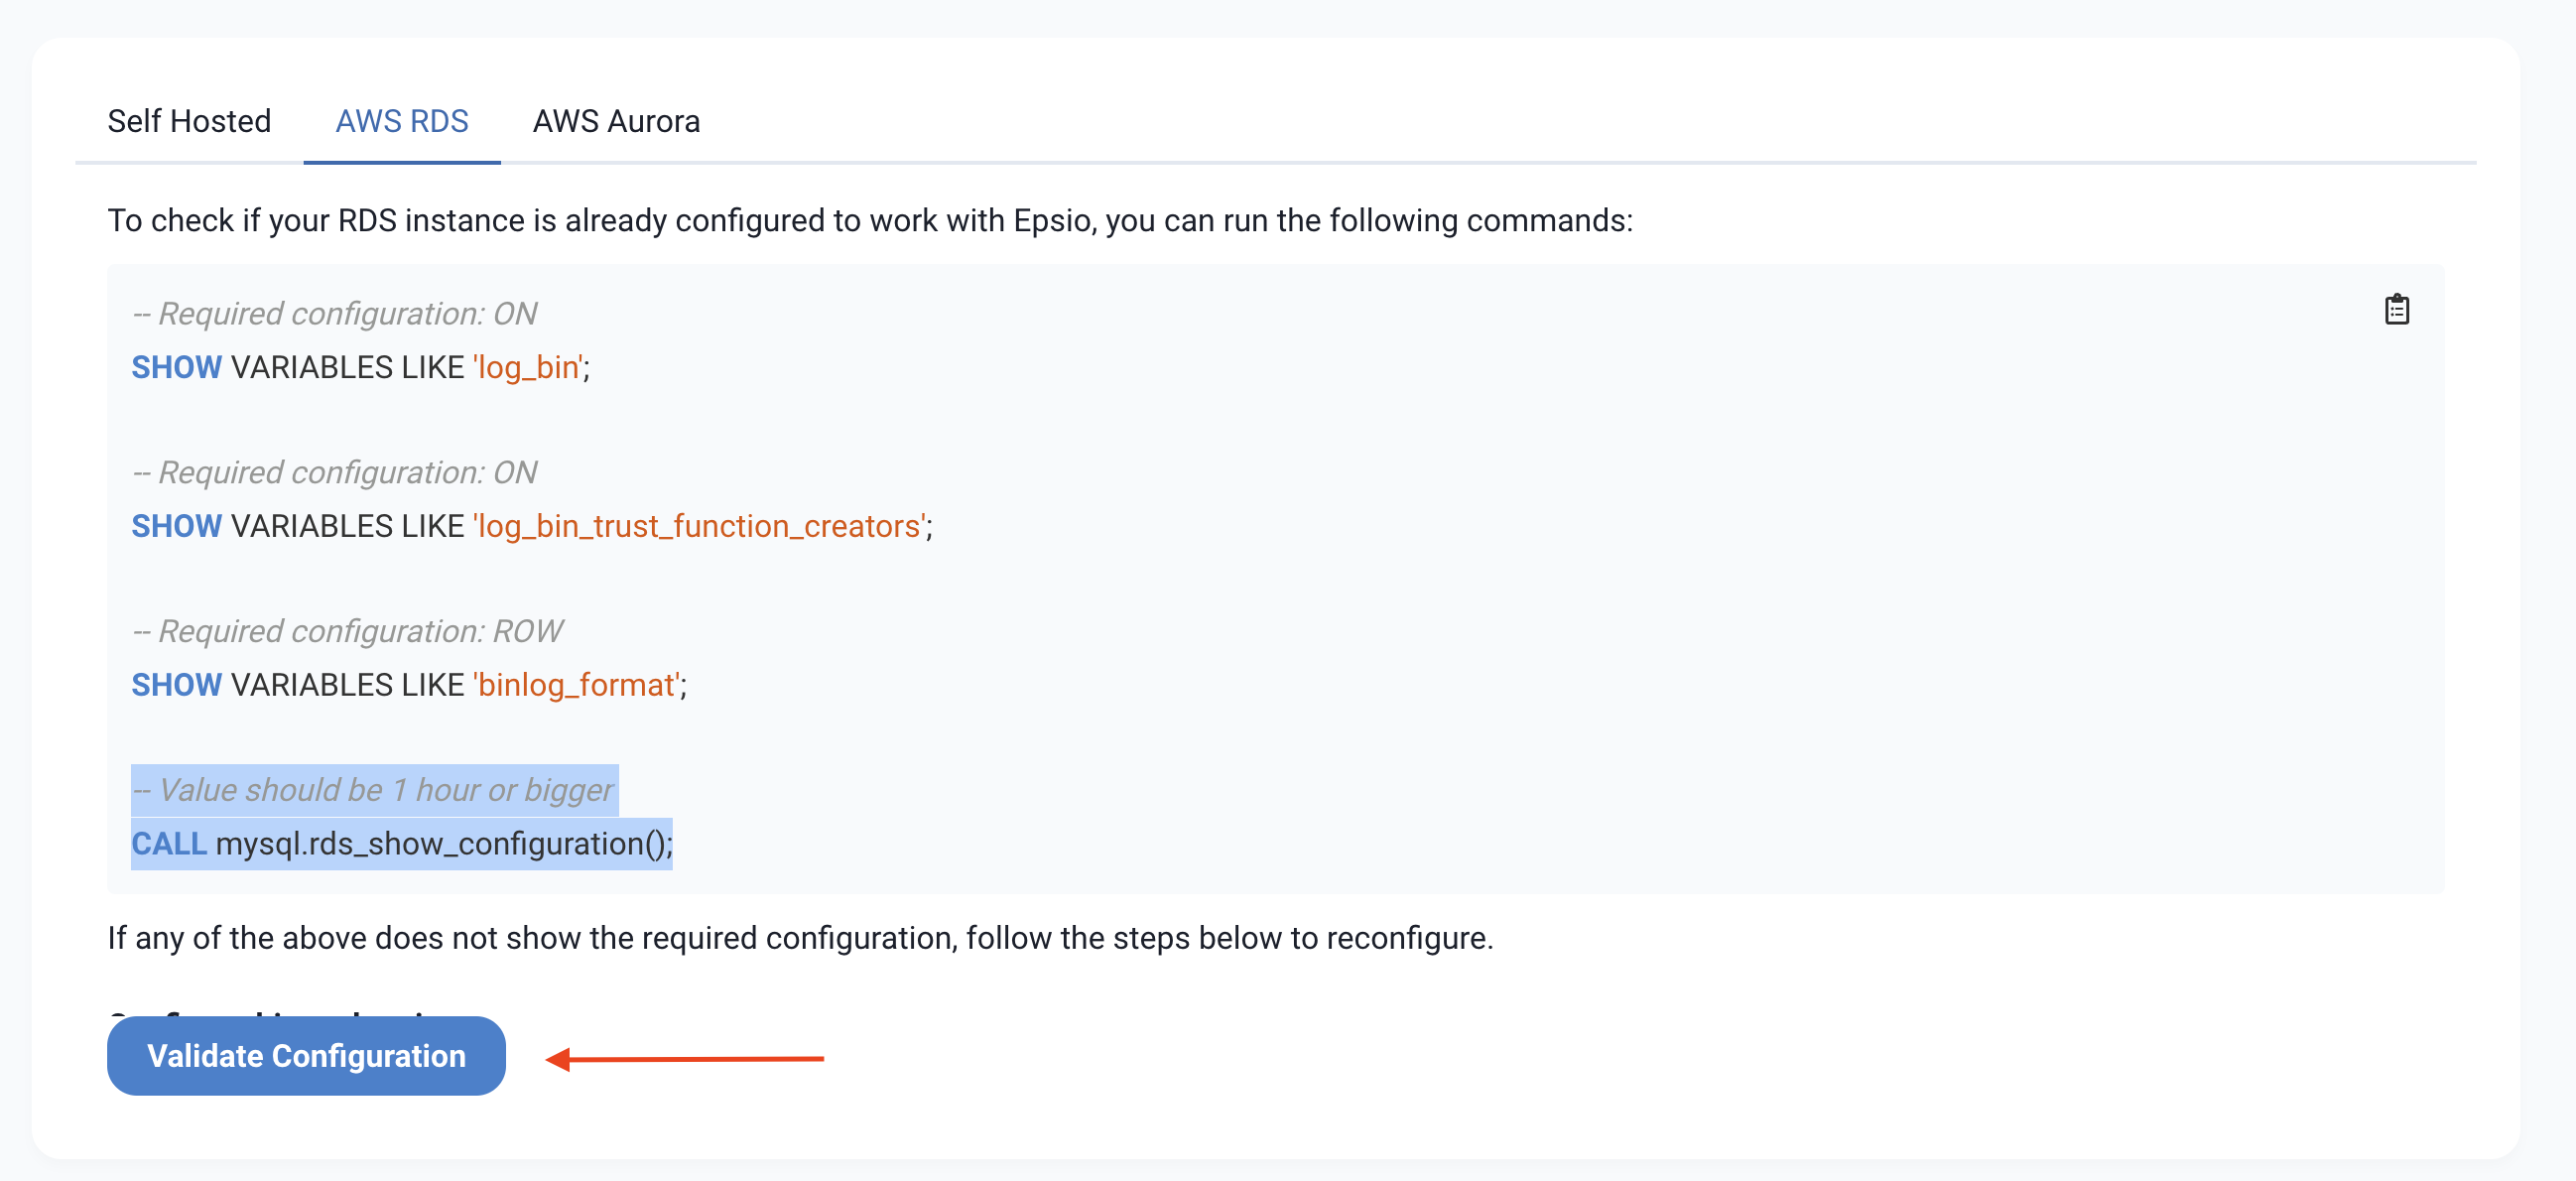
Congratulations! You've successfully enabled replication in your database.
Once Epsio successfully connects to your database, you'll be redirected to the Epsio dashboard.
You are set to go and can create your first view. Visit the create_view for further details.