Epsio Deployment Guide
This guide will walk you through the process of deploying Epsio for Epsio in your AWS environment.
Before you begin
Before proceeding with the deployment guide, ensure that you have the following:
- The VPC and subnet in your AWS account where you want to deploy Epsio in.
Make sure that the VPC has the required network access policy. - A PostgreSQL Database with version 10+.
- An AWS user with the following permissions:
- Create, launch, stop, and rollback CloudFormation stacks.
- Create EC2 instances
1. Prepare your database for Epsio
This step will walk you through setting up your database to allow Epsio to connect to it. In this step, you will create a user Epsio can use, as well as a schema Epsio will create procedures/functions in. In step 3, you will supply Epsio with the password you created for the Epsio user.
Open a connection to your database and follow the steps below.
Create a schema for Epsio's metadata:
Create a database user for Epsio's exclusive use:
Replace secret with a strong password
Grant user permissions
Grant the epsio_user access to the epsio schema:
GRANT USAGE ON SCHEMA epsio TO epsio_user;
GRANT CREATE ON SCHEMA epsio TO epsio_user;
GRANT ALL PRIVILEGES ON ALL TABLES IN SCHEMA epsio TO epsio_user;
epsio_user read-only access to all tables in your schema by running the following commands: GRANT SELECT ON ALL TABLES IN SCHEMA public TO epsio_user;
ALTER DEFAULT PRIVILEGES IN SCHEMA public GRANT SELECT ON TABLES TO epsio_user;
GRANT CREATE, USAGE ON SCHEMA public TO epsio_user;
If you plan to access schemas other than the public schema, you'll need to run these commands for each schema.
Replace public with the name of your schema.
Continue to the next step to configure logical replication.
2. Configure logical replication
2.1 Check if logical replication is enabled
Run the following command to check if your instance is already configured with logical replication:
postgres> SHOW rds.logical_replication;
 rds.logical_replication
-------------------------
 off
(1 row)
on (or 1), it means that logical replication is enabled, skip to set up replication.If not, follow the steps below to enable logical replication.
2.2 Enable logical replication
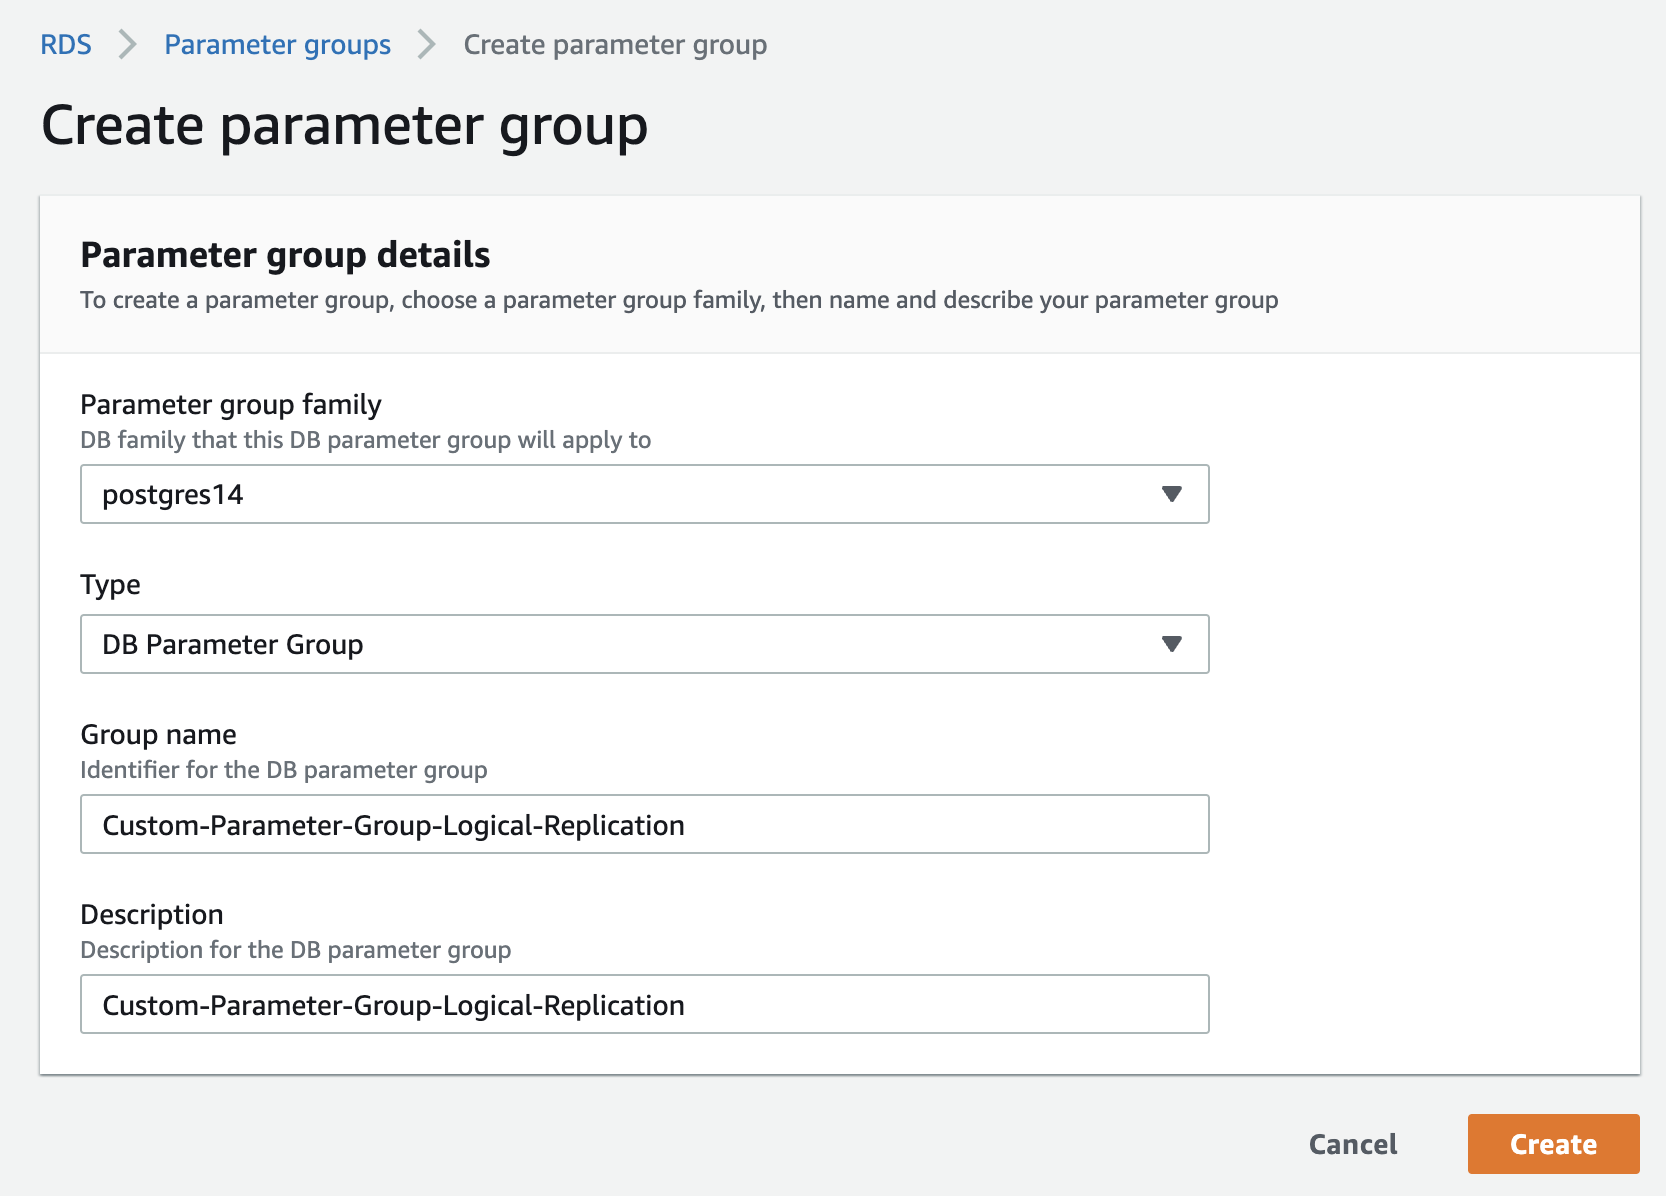
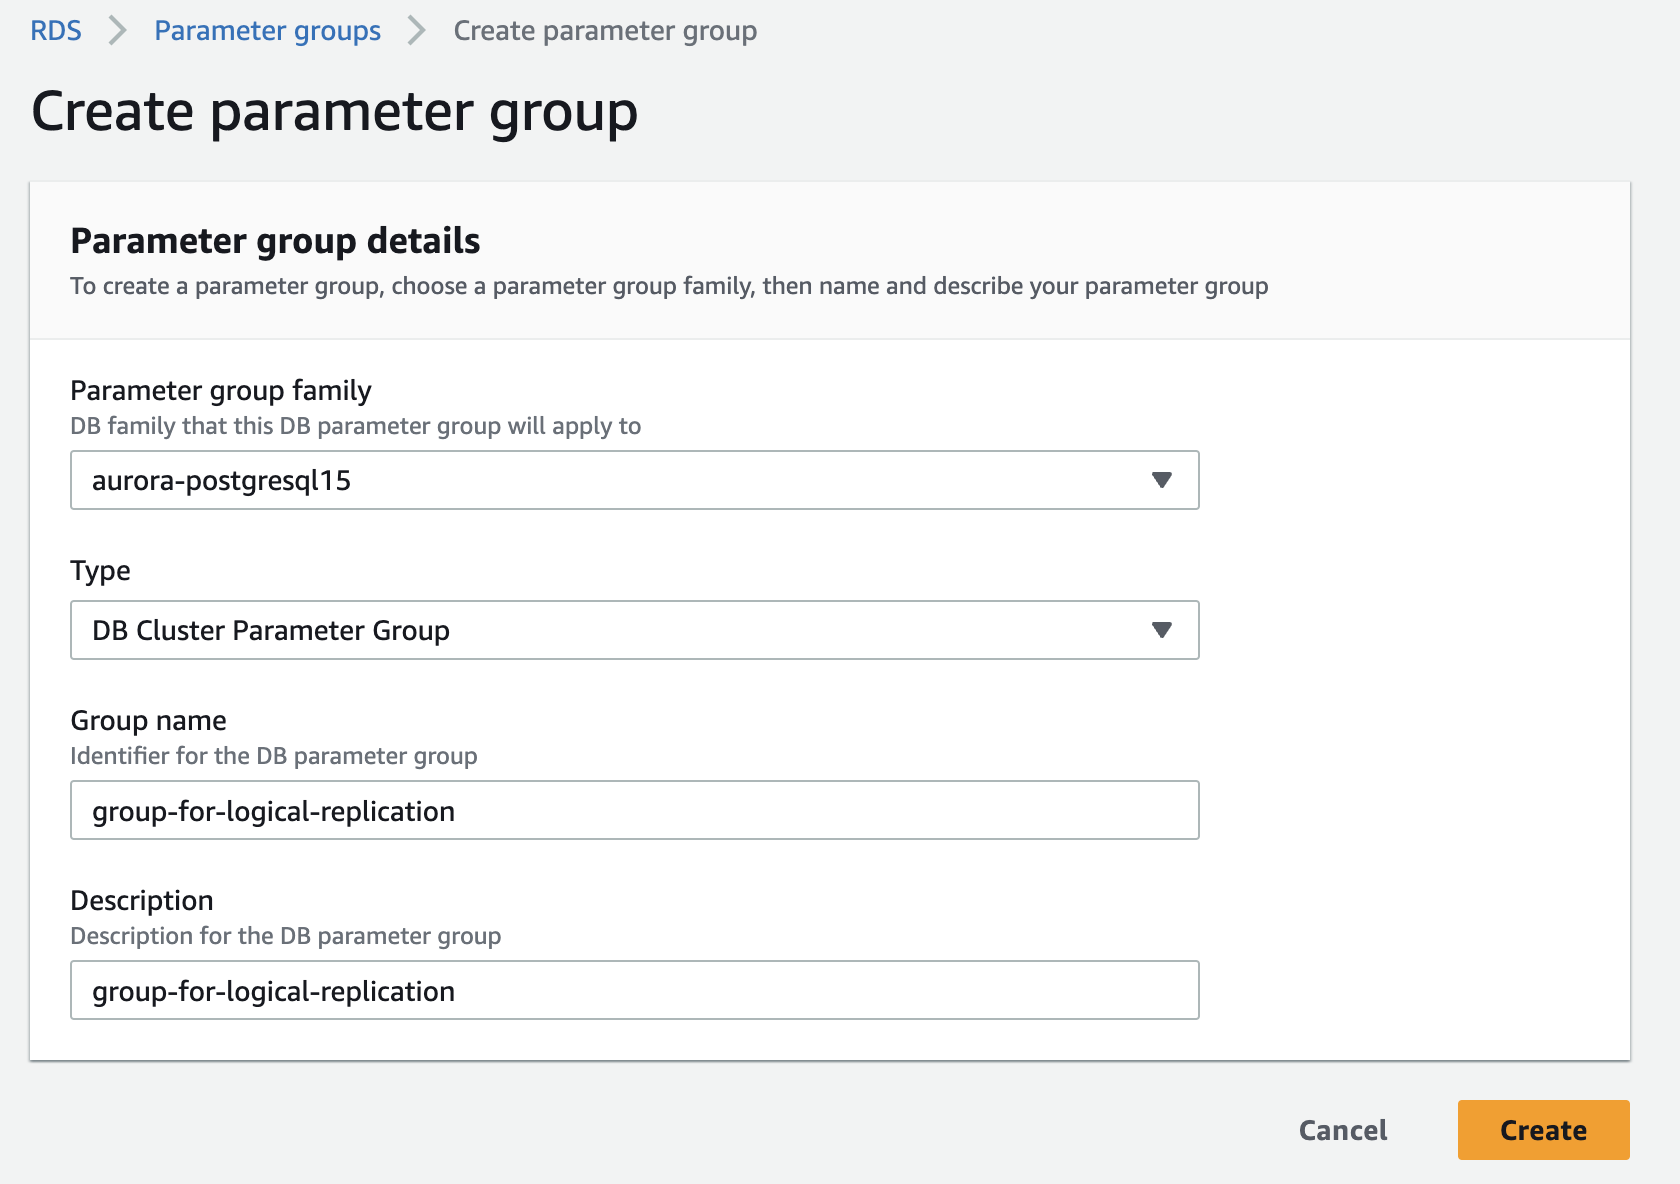
Create a custom RDS parameter group. If your instance already uses a custom parameter group, skip to the next stage.
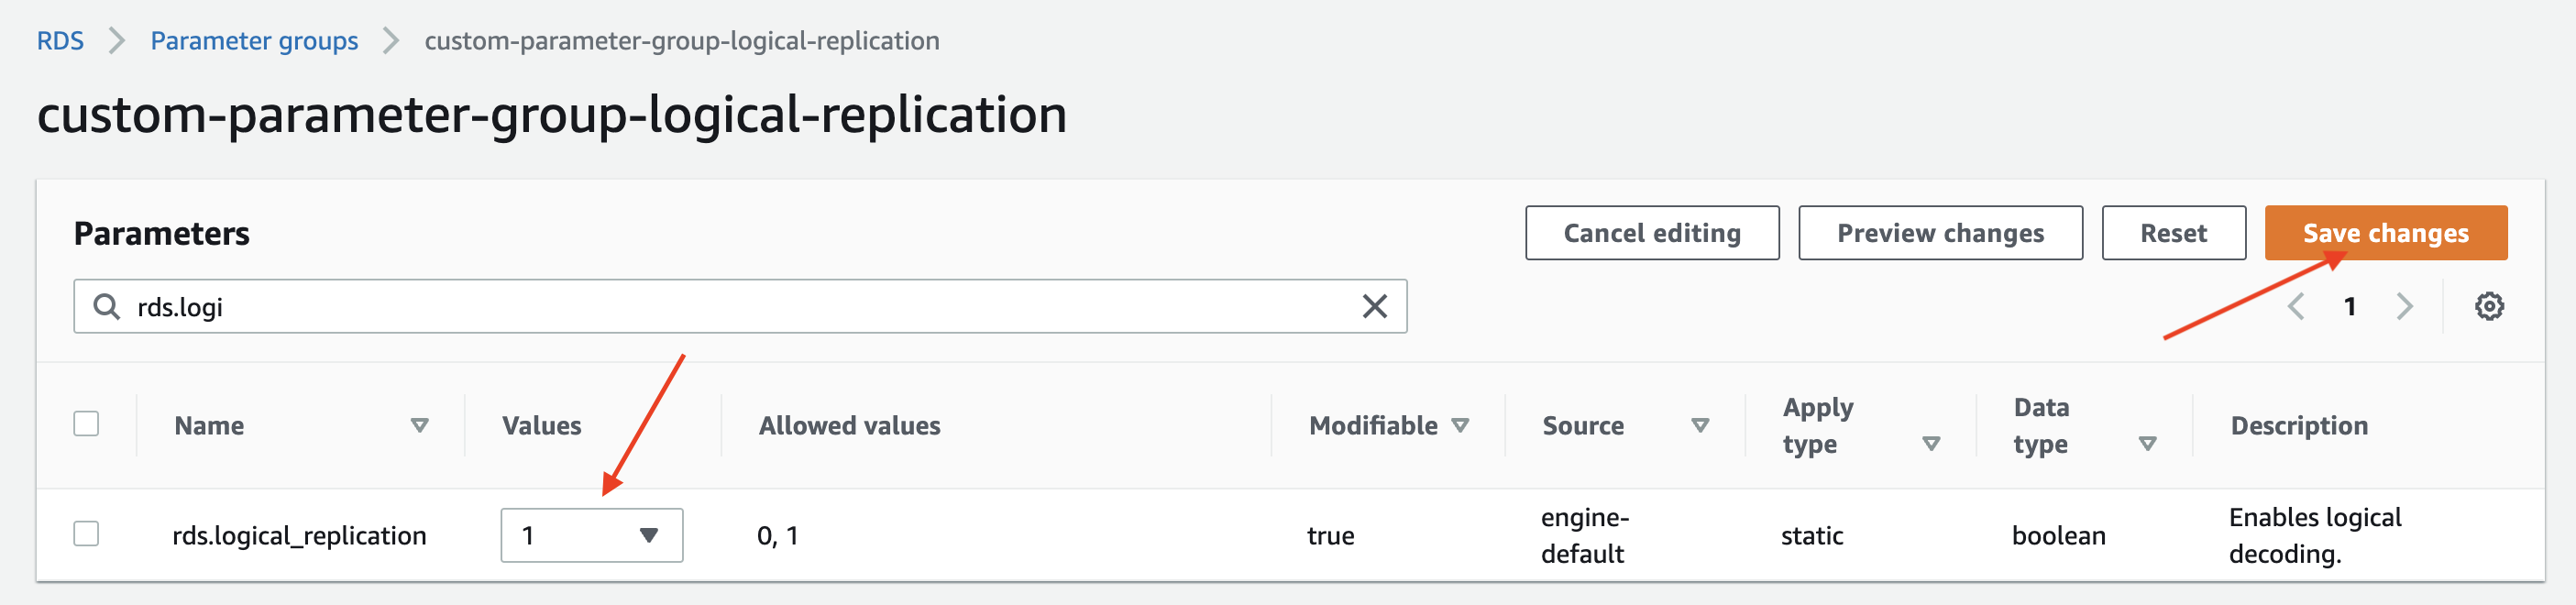
Edit the custom parameter group. set the rds.logical_replication parameter to 1.
Optional: Set the max_slot_wal_keep_size parameter to 51200 to limit the amount of WAL data that is retained for logical replication slots. (Postgres 13+)
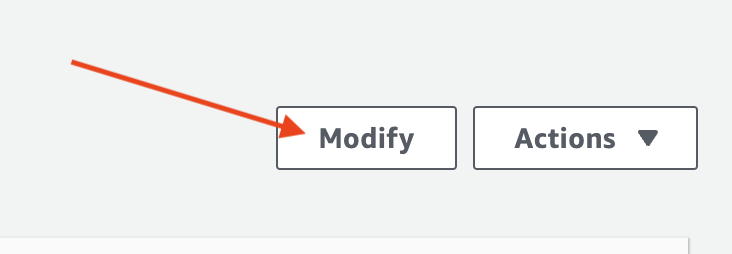
Associate the custom parameter group with your RDS instance. Go to the RDS management console, select your instance and click on the "Modify" button.
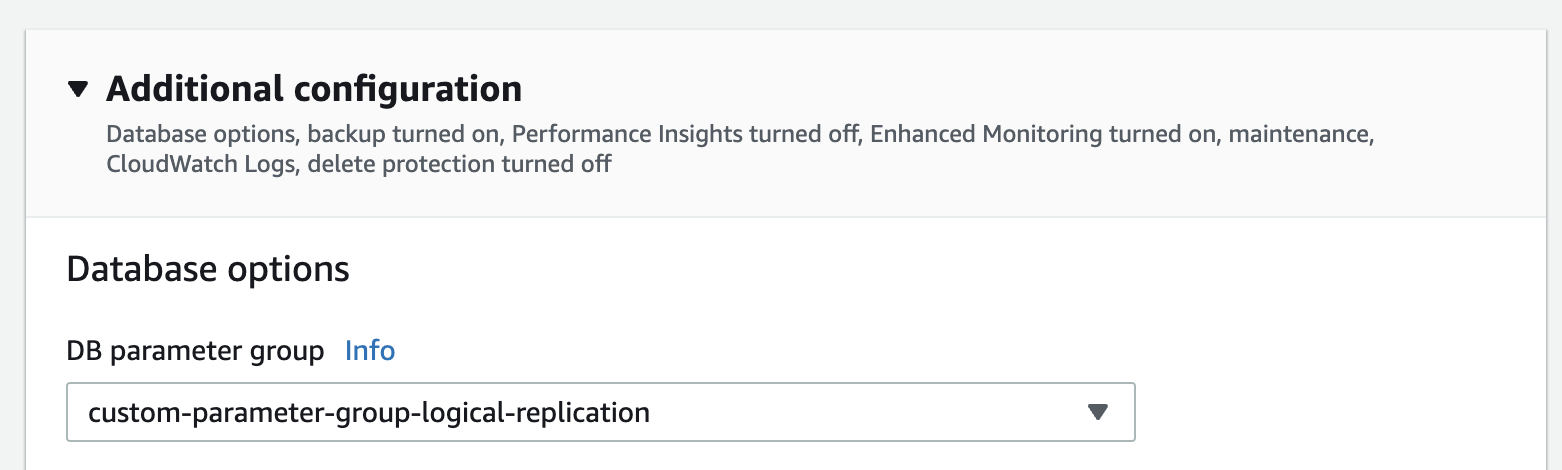
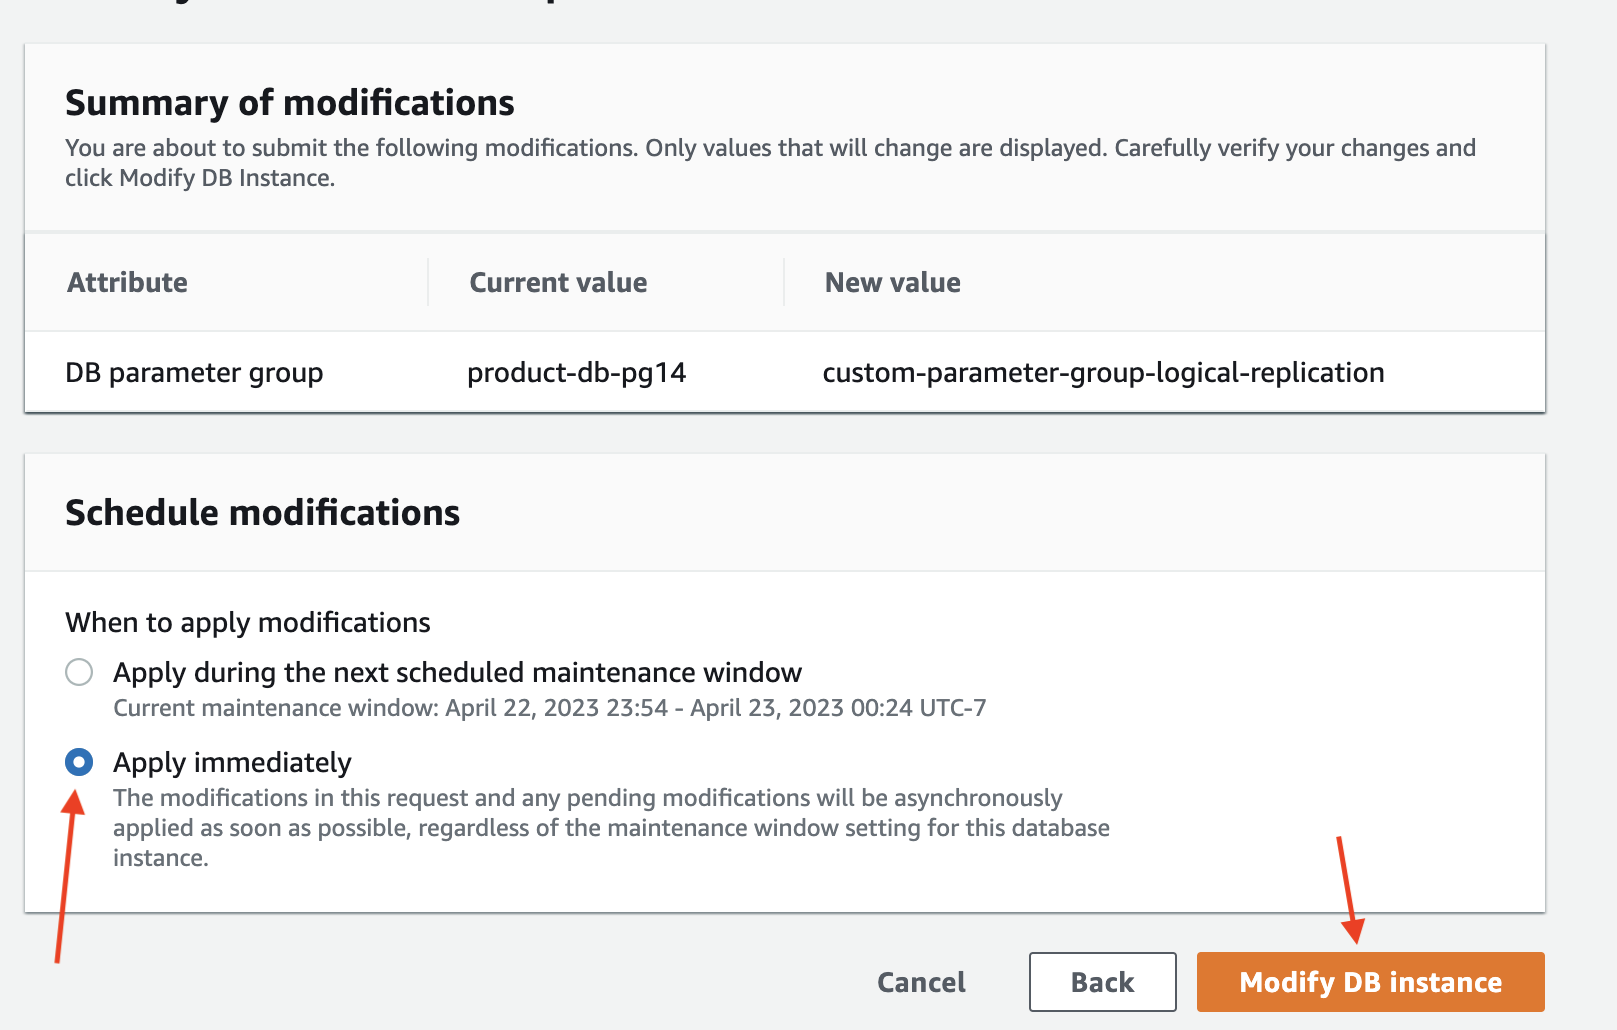
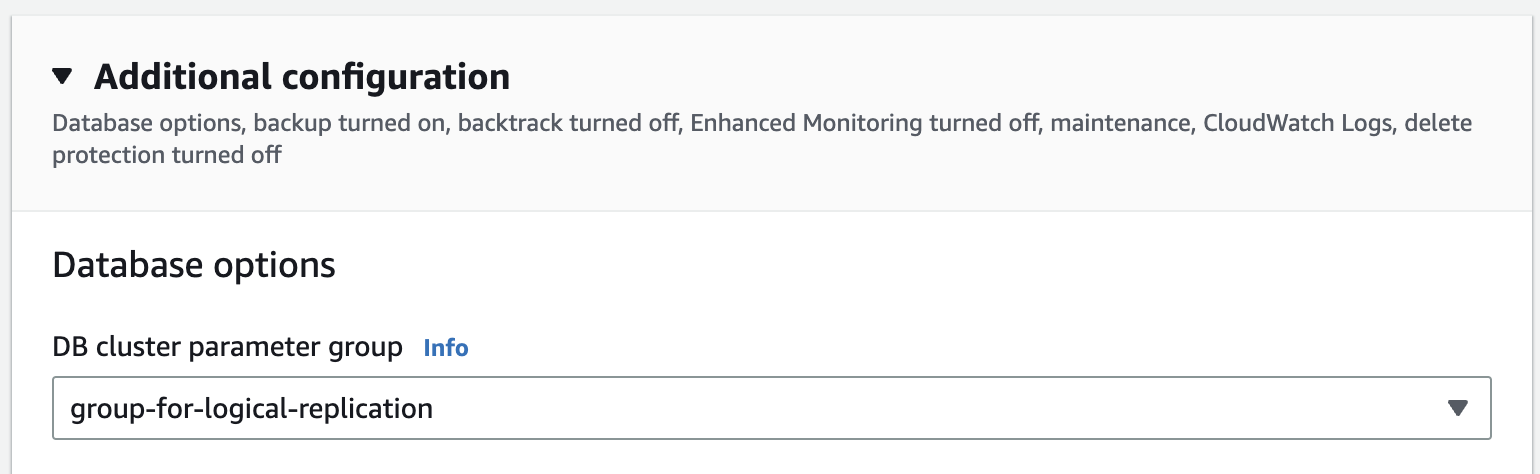
In the "Modify DB Instance" page, select the custom parameter group you created in the previous step.
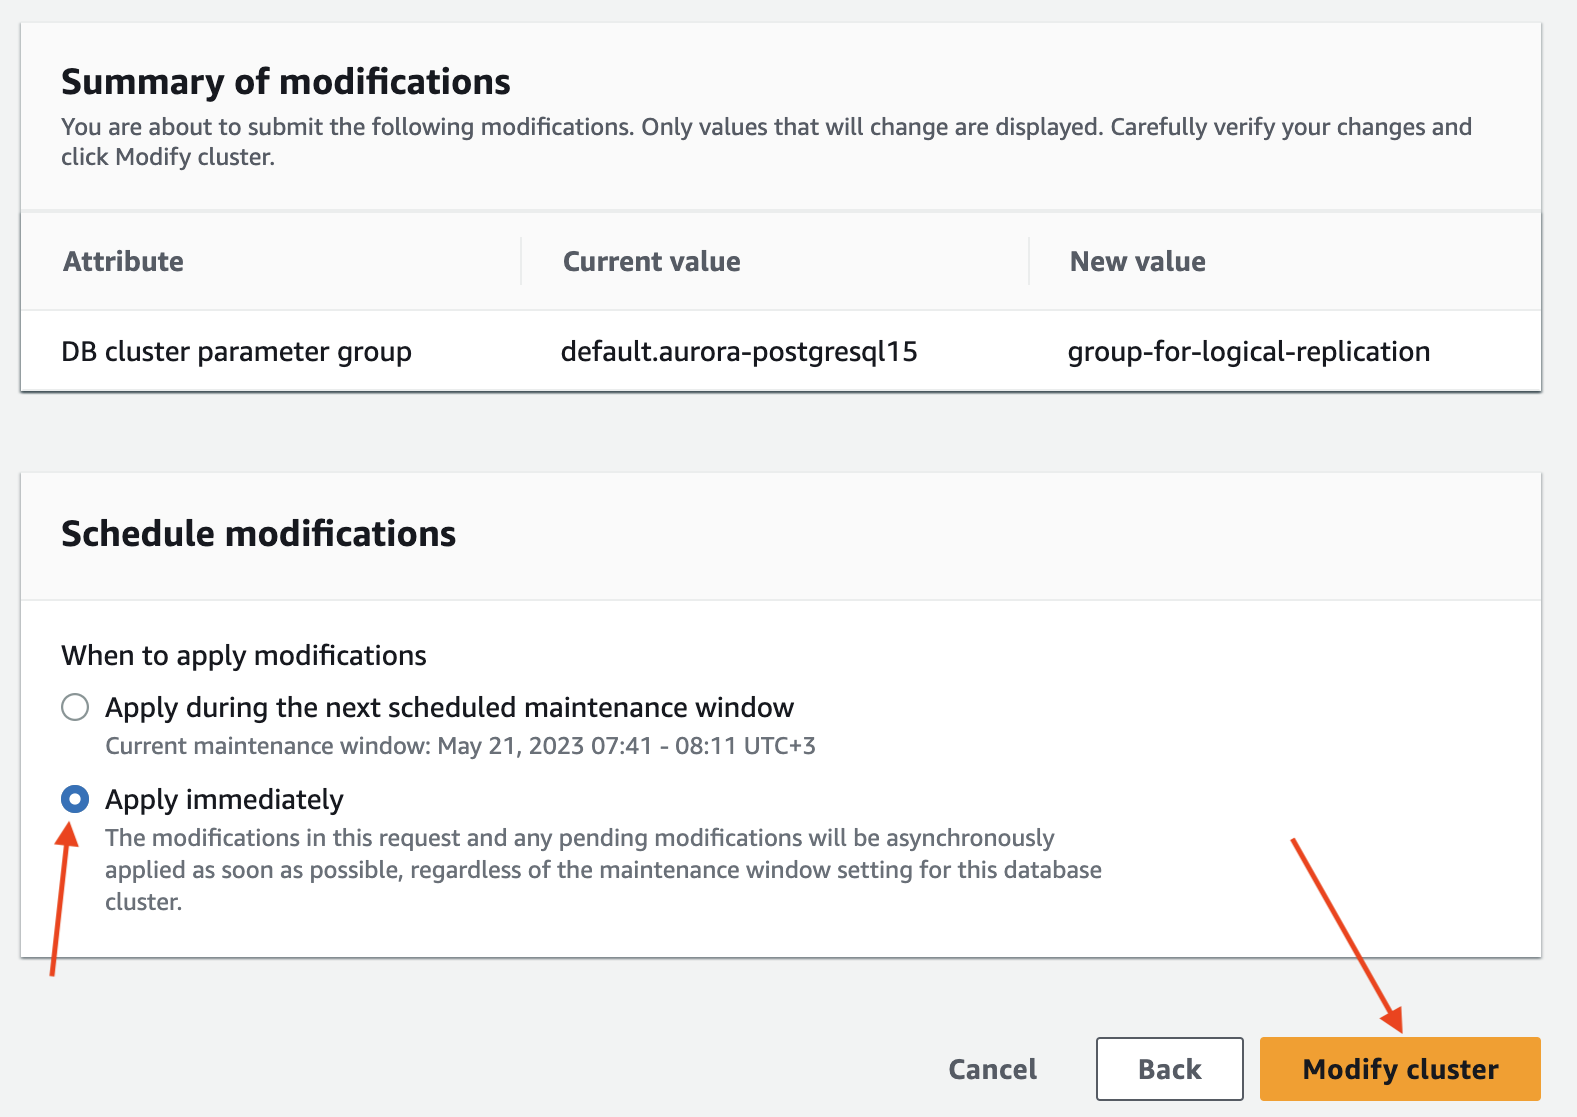
Make sure you choose "Apply Immediately" to apply the changes immediately.
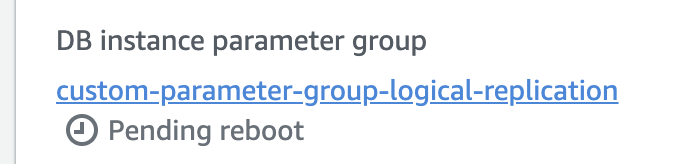
Wait for the parameter group configuration to change to "Pending reboot" status.
The parameter group status can be found in the "Configuration" tab of your RDS instance. 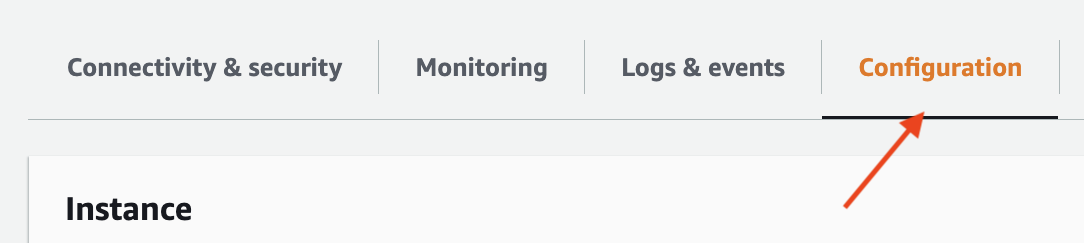
Then, reboot the database for the changes to take effect.
You'll know that the changes have taken affect when the status of your DB instance Parameter Group changes to "In Sync".

Verify that the rds.logical_replication parameter is set to "on" (or 1).
Create a custom Aurora parameter group. If your instance already uses a custom parameter group, skip to the next stage.
Edit the custom parameter group, set the rds.logical_replication parameter to 1.
Optional: Set the max_slot_wal_keep_size parameter to 51200 to limit the amount of WAL data that is retained for logical replication slots. (Postgres 13+)
Associate the custom parameter group with your Aurora cluster. Go to the RDS management console, select your instance and click on the "Modify" button.
In the "Modify DB Instance" page, select the custom parameter group you created in the previous step.
Make sure you choose "Apply Immediately" to apply the changes immediately.
Wait for the parameter group configuration to change to "Pending reboot" status.
The parameter group status can be found in the "Configuration" tab of your RDS instance. 
Then, reboot the database for the changes to take effect.
You'll know that the changes have taken affect when the status of your DB instance Parameter Group changes to "In Sync".

Verify that the rds.logical_replication parameter is set to "on" (or 1).
To enable logical replication in a PostgreSQL database, you need to set the wal_level parameter in your database configuration to logical. For standard PostgreSQL installations, you can do this by either:
- Method 1: Adding a
wal_level = logicalline to thepostgresql.conffile. - Method 2: Running
ALTER SYSTEM SET wal_level = logical;;
Optional: Set the max_slot_wal_keep_size parameter to 51200 to limit the amount of WAL data that is retained for logical replication slots. (Postgres 13+)
Restart your database for the changes to take effect.
Verify that the wal_level parameter is set to "logical".
2.3 Set up replication
Next, you'll need to set up replication by running the following commands in your database:
3. Launch Epsio in your cloud environment
Epsio uses a Cloudformation stack to create and manage your Epsio deployment.
First, click "Create Deployment" in the dashboard, and select Postgres as your database.
Next, choose "AWS CloudFormation" in the sidebar, and in the "Install Epsio CloudFormation" step, click "Create Deployment".
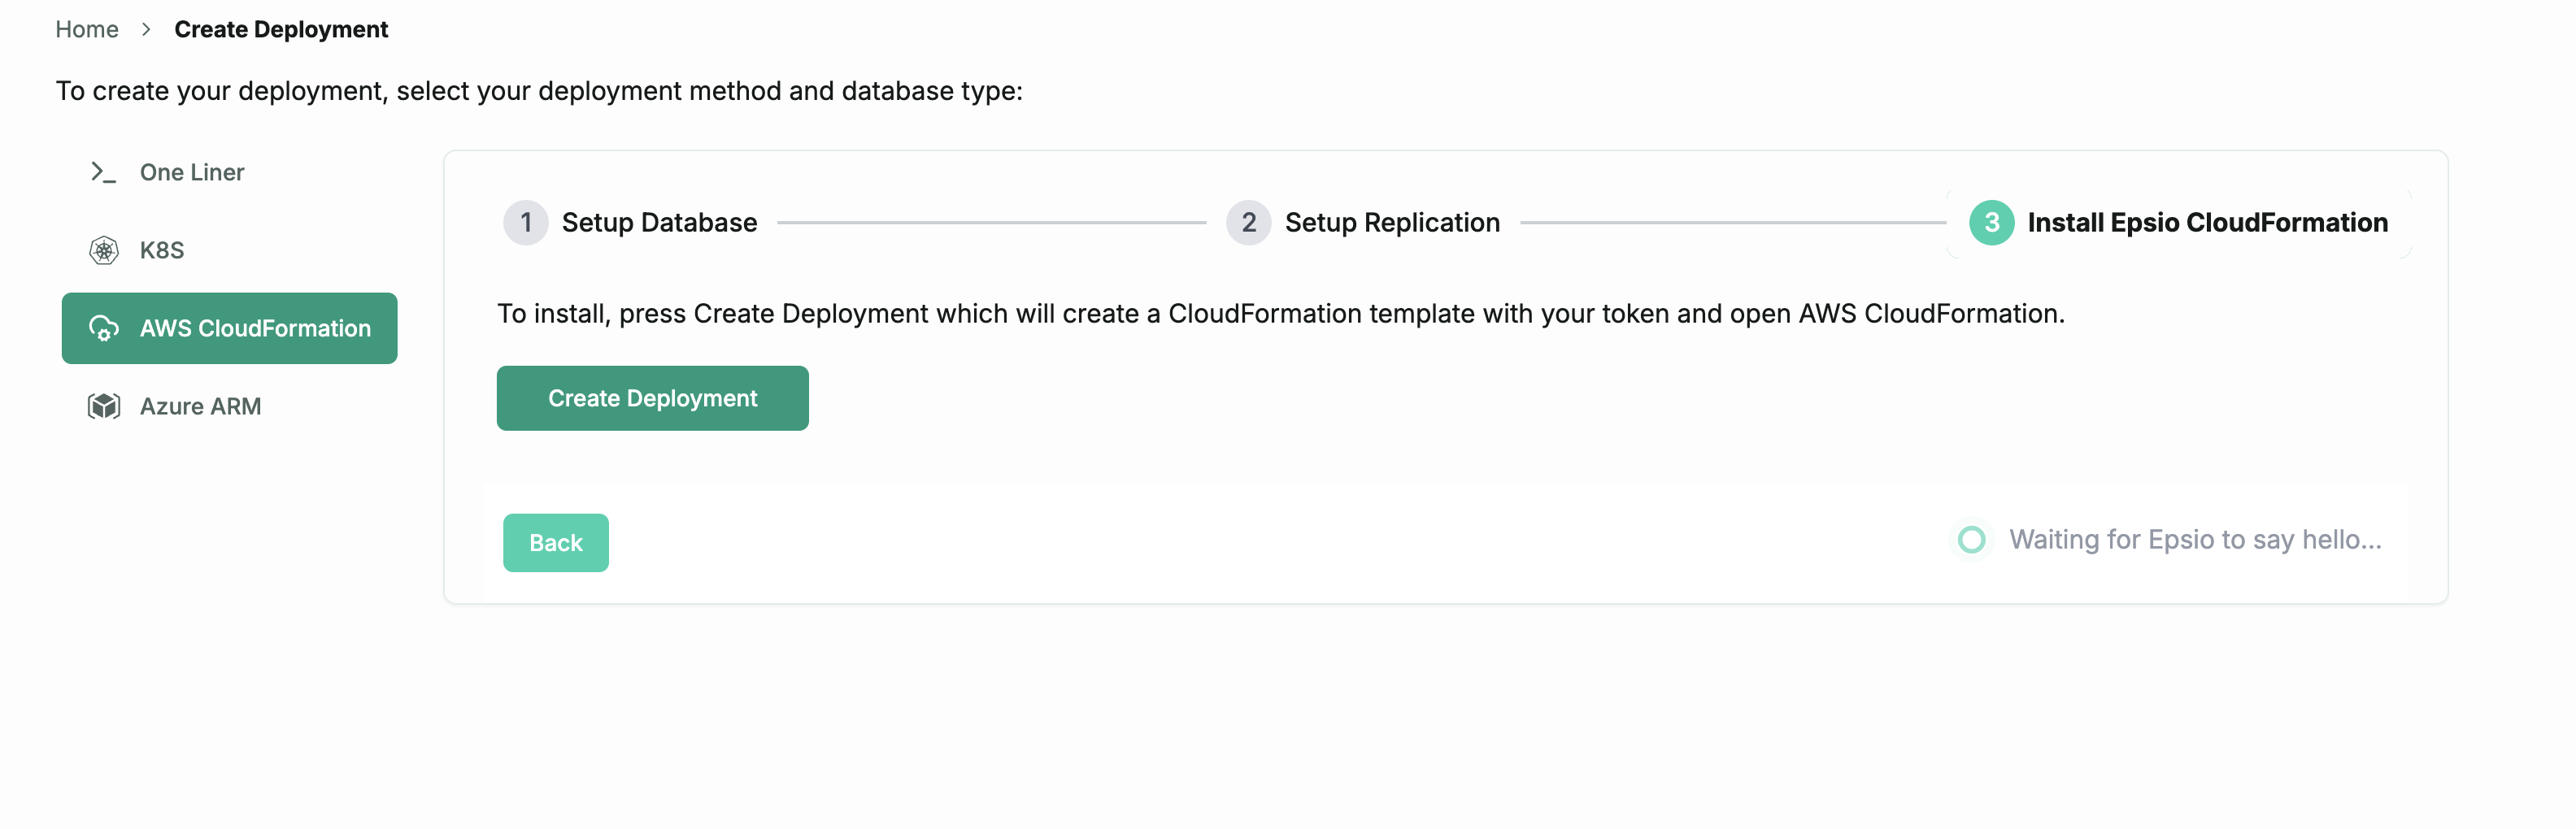
This will launch a CloudFormation template used to launch your Epsio instance. In the CloudFormation template, supply the database information as well as the Epsio instance size:
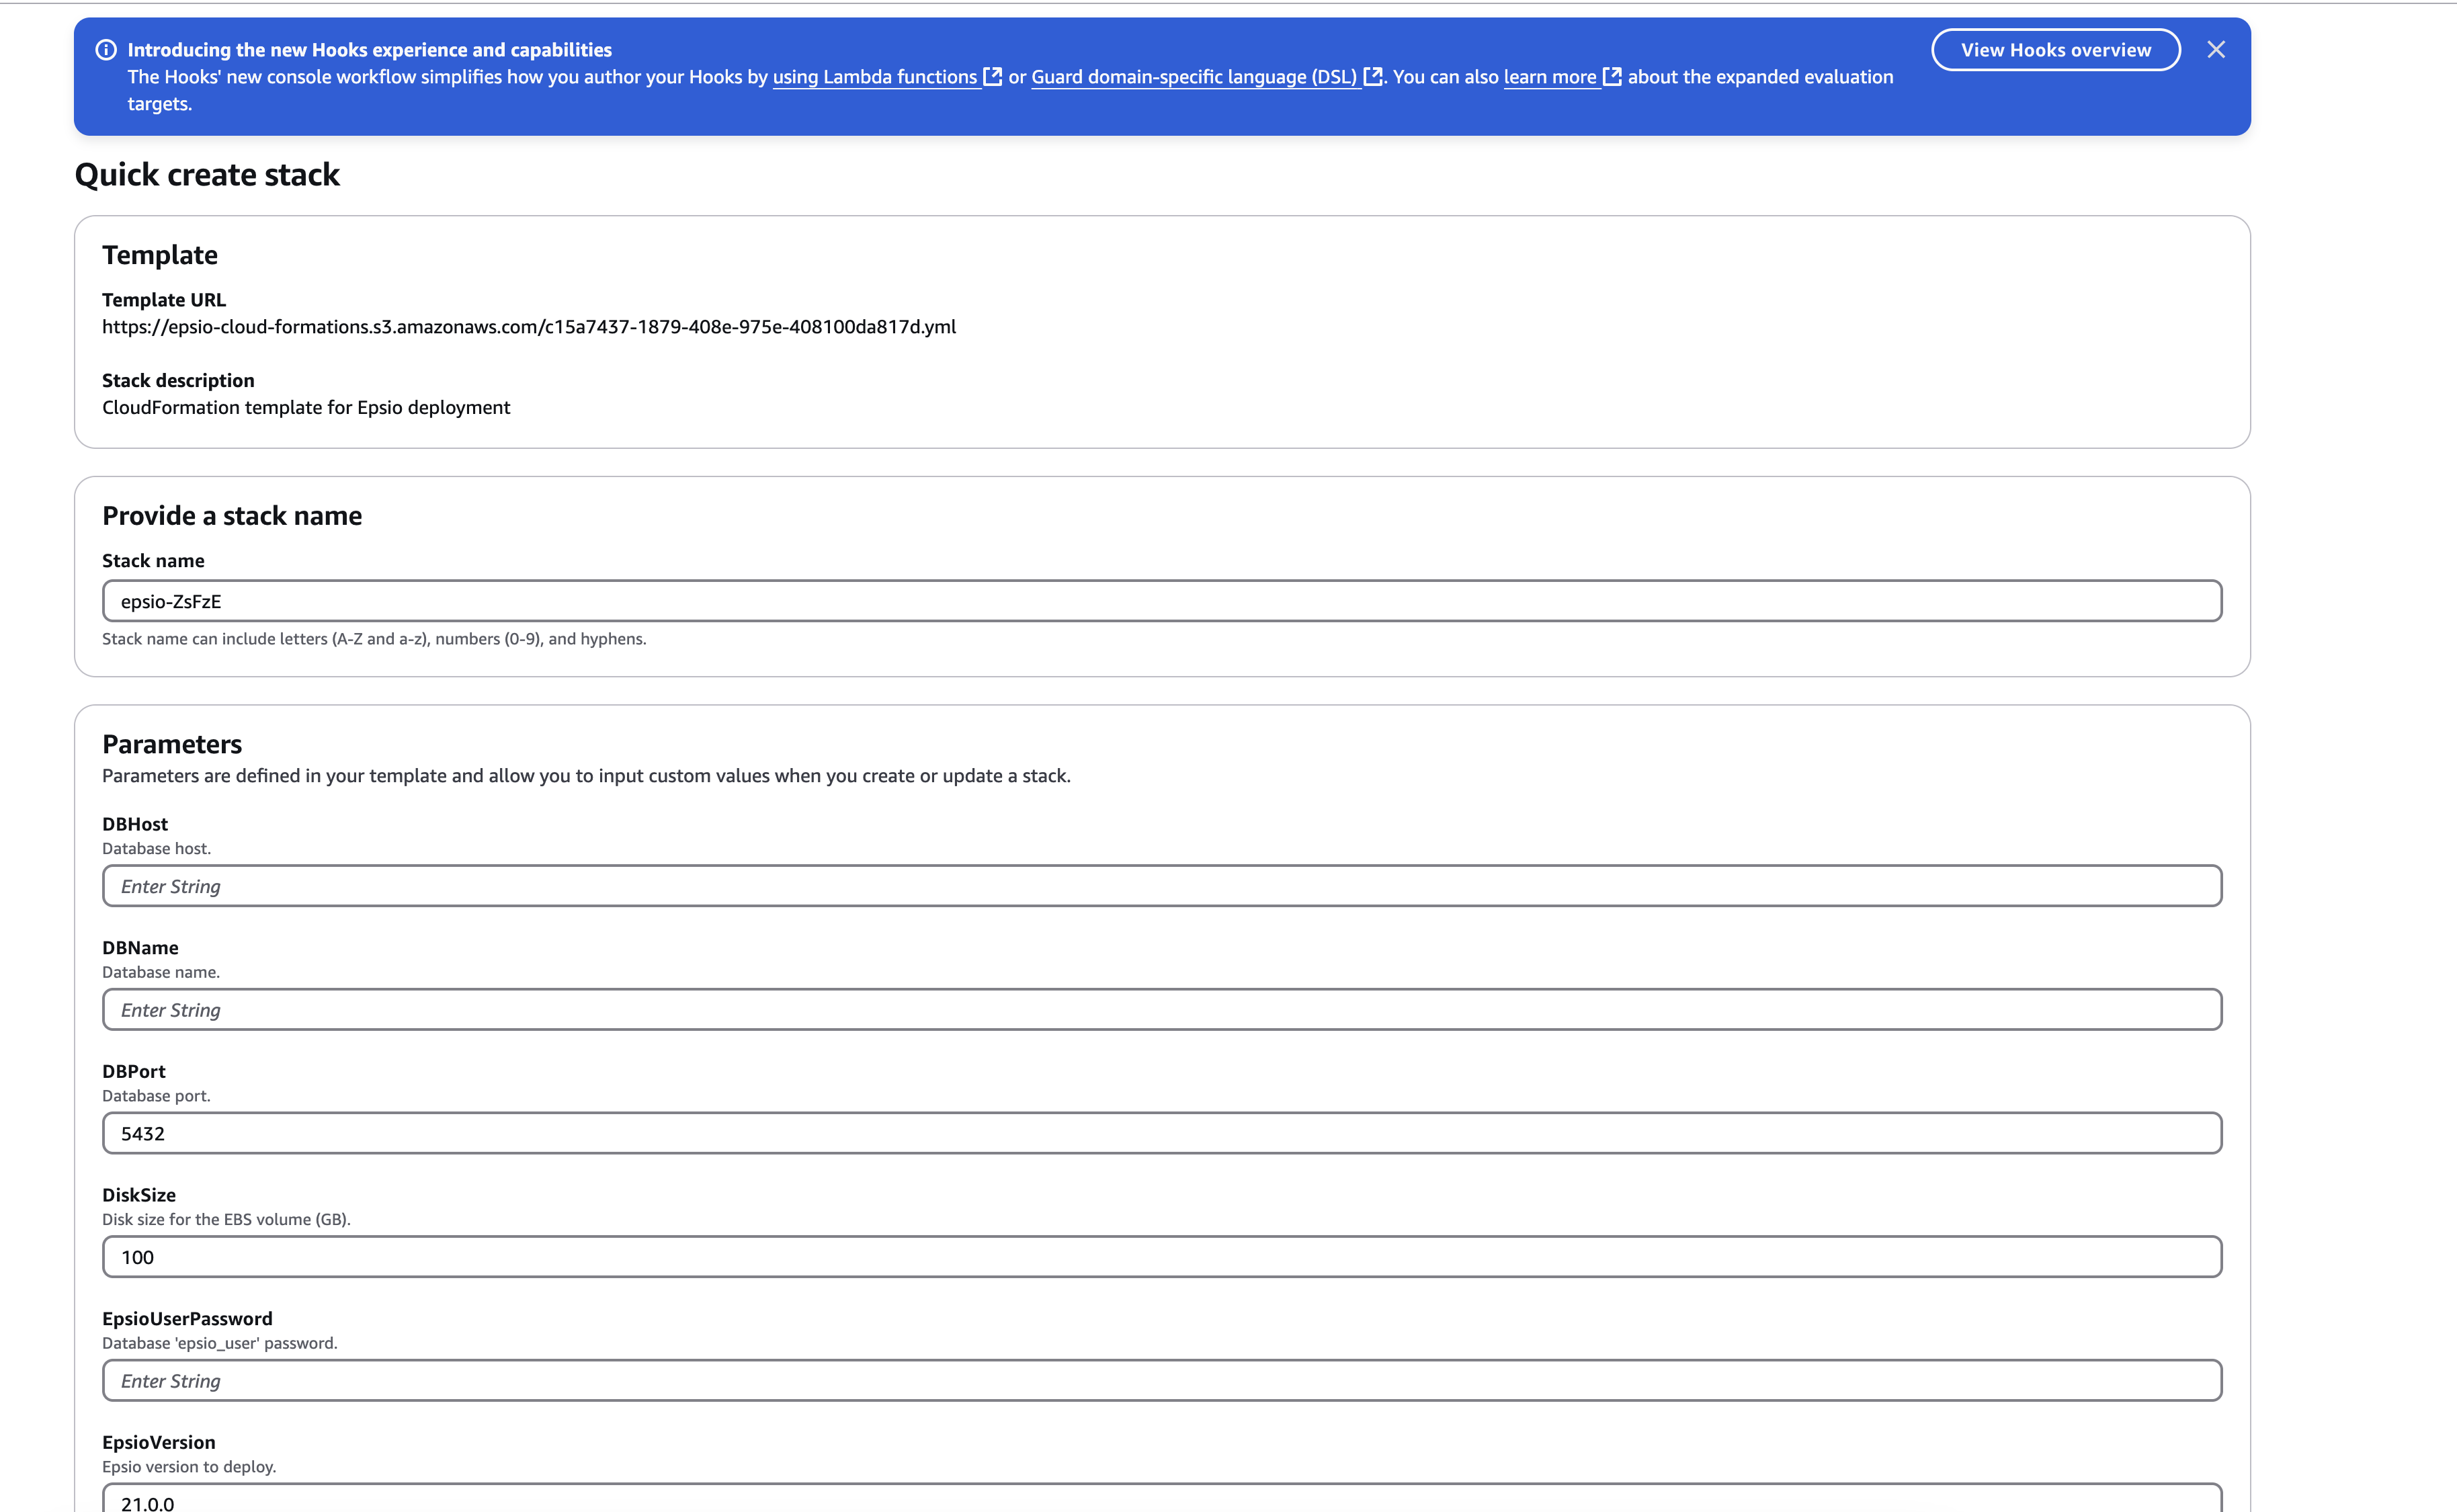
Note that the Epsio Password is the password you created in Step 1.
Once Epsio successfully installs, you'll be redirected to the Epsio dashboard.
Any errors/warnings in connecting to your database can be viewed in the Epsio dashboard.
You are set to go and can create your first view. Visit the create_view for further details.