Epsio Deployment Guide - One Liner
This guide will walk you through the process of deploying Epsio.
Before you begin
Before proceeding with the deployment guide, ensure that you have the following:
- A Linux/Macbook machine to run epsio on with:
- Network access to your MySQL instance.
docker,docker composeplugin andzipinstalled on it
- A MySQL Database with version 5.7+.
1. Prepare your database for Epsio
Open a connection to your database and follow the steps below. In step 3, you will supply Epsio with the password you created for the Epsio user.
Create a database for Epsio's metadata:
Create a database user for Epsio's exclusive use:
Grant new user permissions to the Epsio database
Grant replication permissions to the Epsio user
Grant permission to create result tables and populate existing data
GRANT SELECT, CREATE, SHOW VIEW, CREATE VIEW, ALTER, INSERT, LOCK TABLES, DELETE, DROP ON *.* TO epsio_user;
If you wish to limit access to only specific tables / databases, replace the *.* pattern with the relevant database names and table names you intend on using.
Continue to the next step to configure binlog.
2. Configure Replication
2.1 Check if replication is configured correctly
Run the following command to check if your instance is already configured correctly:
2.2 Enable replication
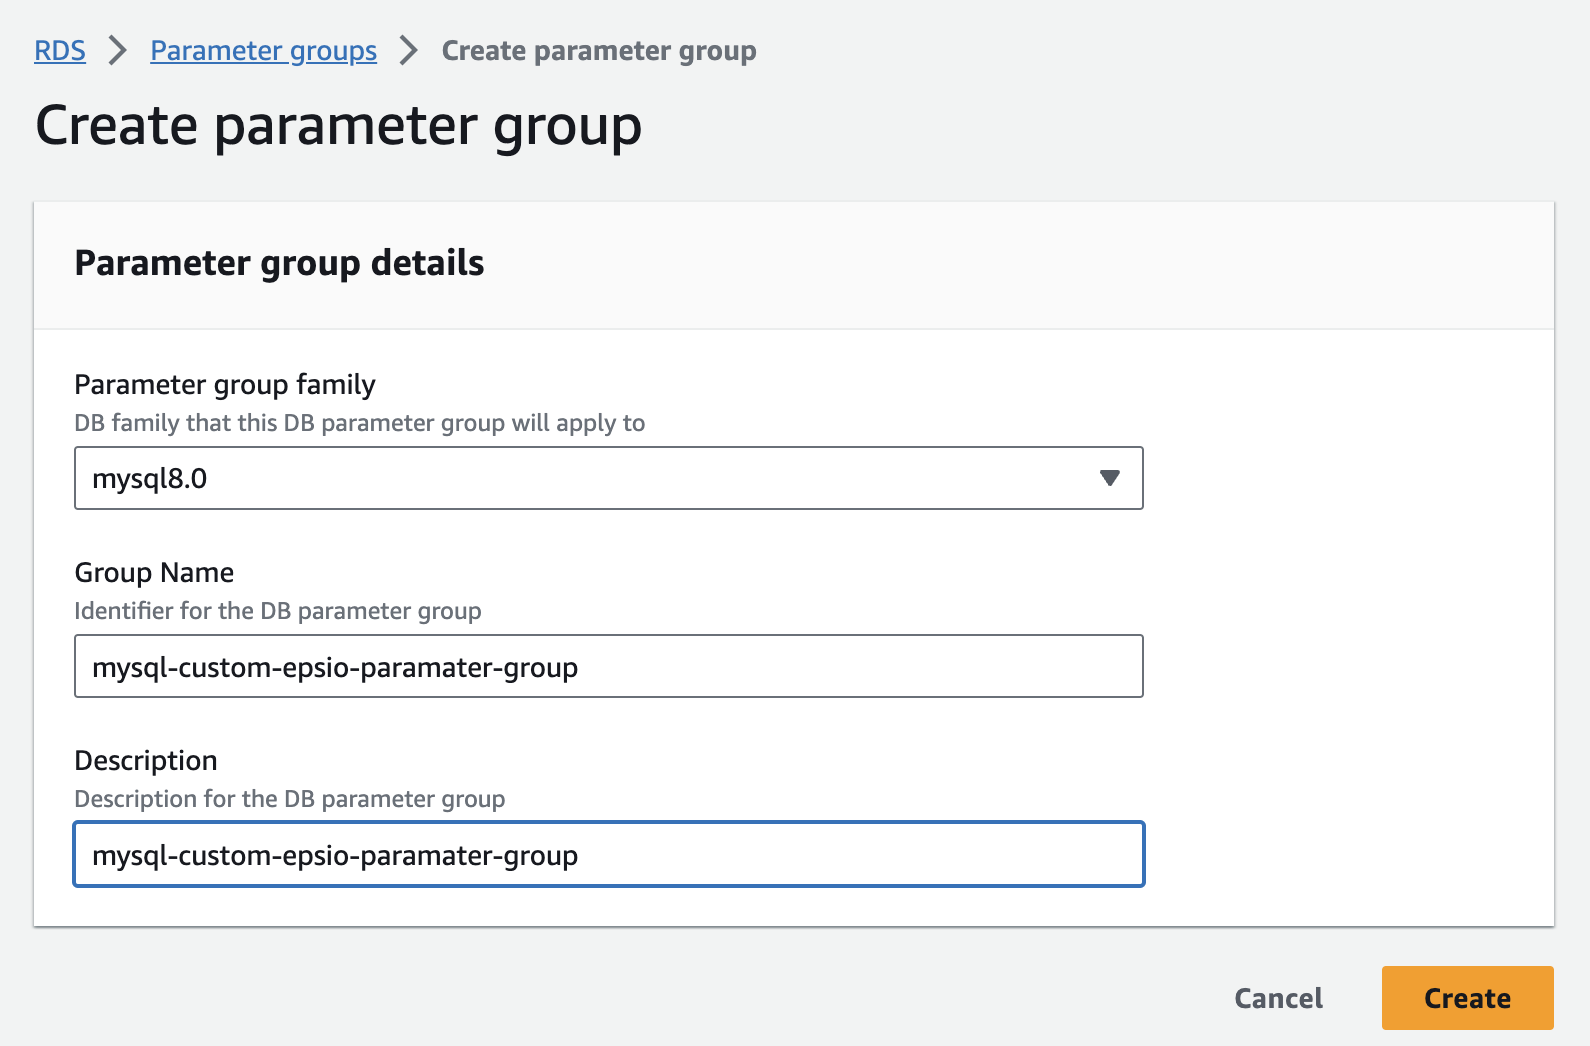
Create a custom RDS parameter group. If your instance already uses a custom parameter group, skip to the next stage.
Edit the custom parameter group.
Set binlog_format parameter to "ROW". 
Set log_bin_trust_function_creators to 1. 
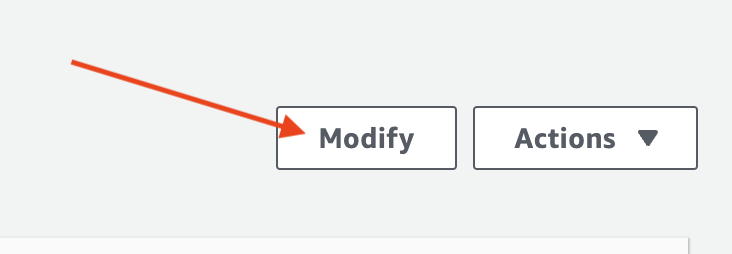
Associate the custom parameter group with your RDS instance. Go to the RDS management console, select your instance and click on the "Modify" button.
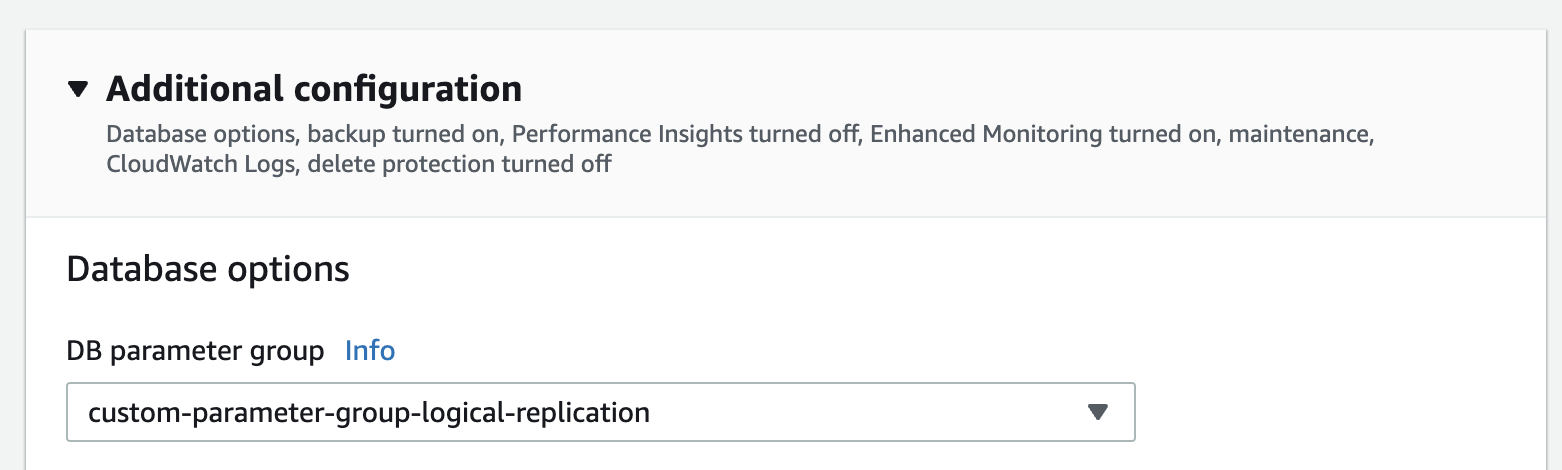
In the "Modify DB Instance" page, select the custom parameter group you created in the previous step.
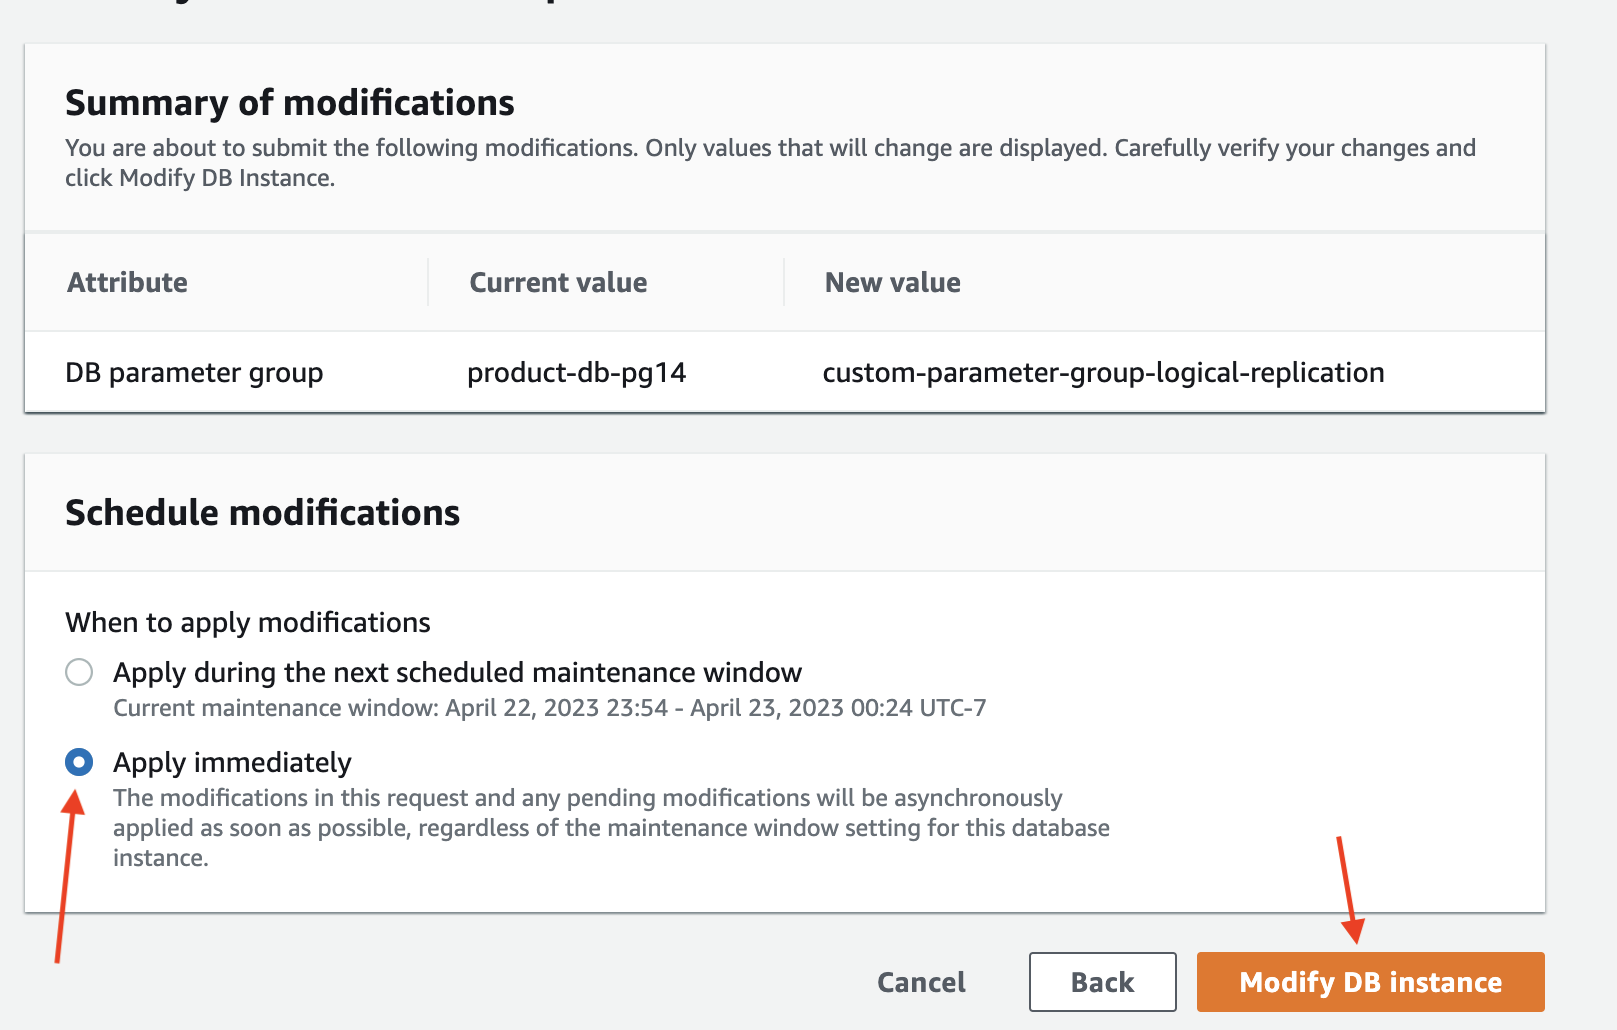
Make sure you choose "Apply Immediately" to apply the changes immediately.
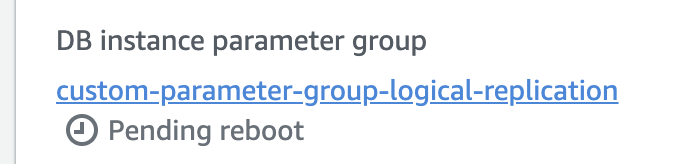
Wait for the parameter group configuration to change to "Pending reboot" status.
The parameter group status can be found in the "Configuration" tab of your RDS instance. 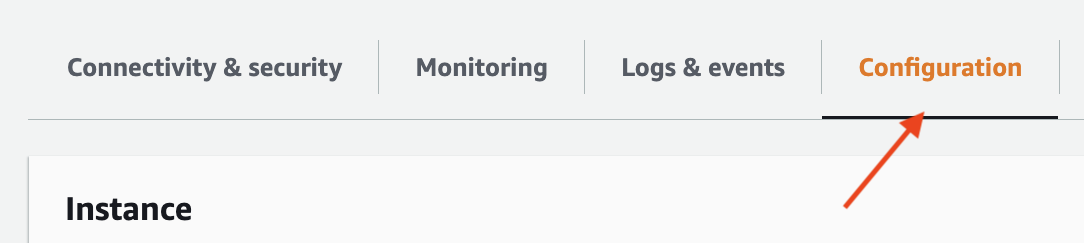
Then, reboot the database for the changes to take effect.
You'll know that the changes have taken affect when the status of your DB instance Parameter Group changes to "In Sync".

After the instance reboots, edit the RDS retention policy:
Verify that all the new configurations are enabled by running the following commands:
Create a custom Aurora cluster parameter group. If your instance already uses a custom cluster parameter group, skip to the next stage.
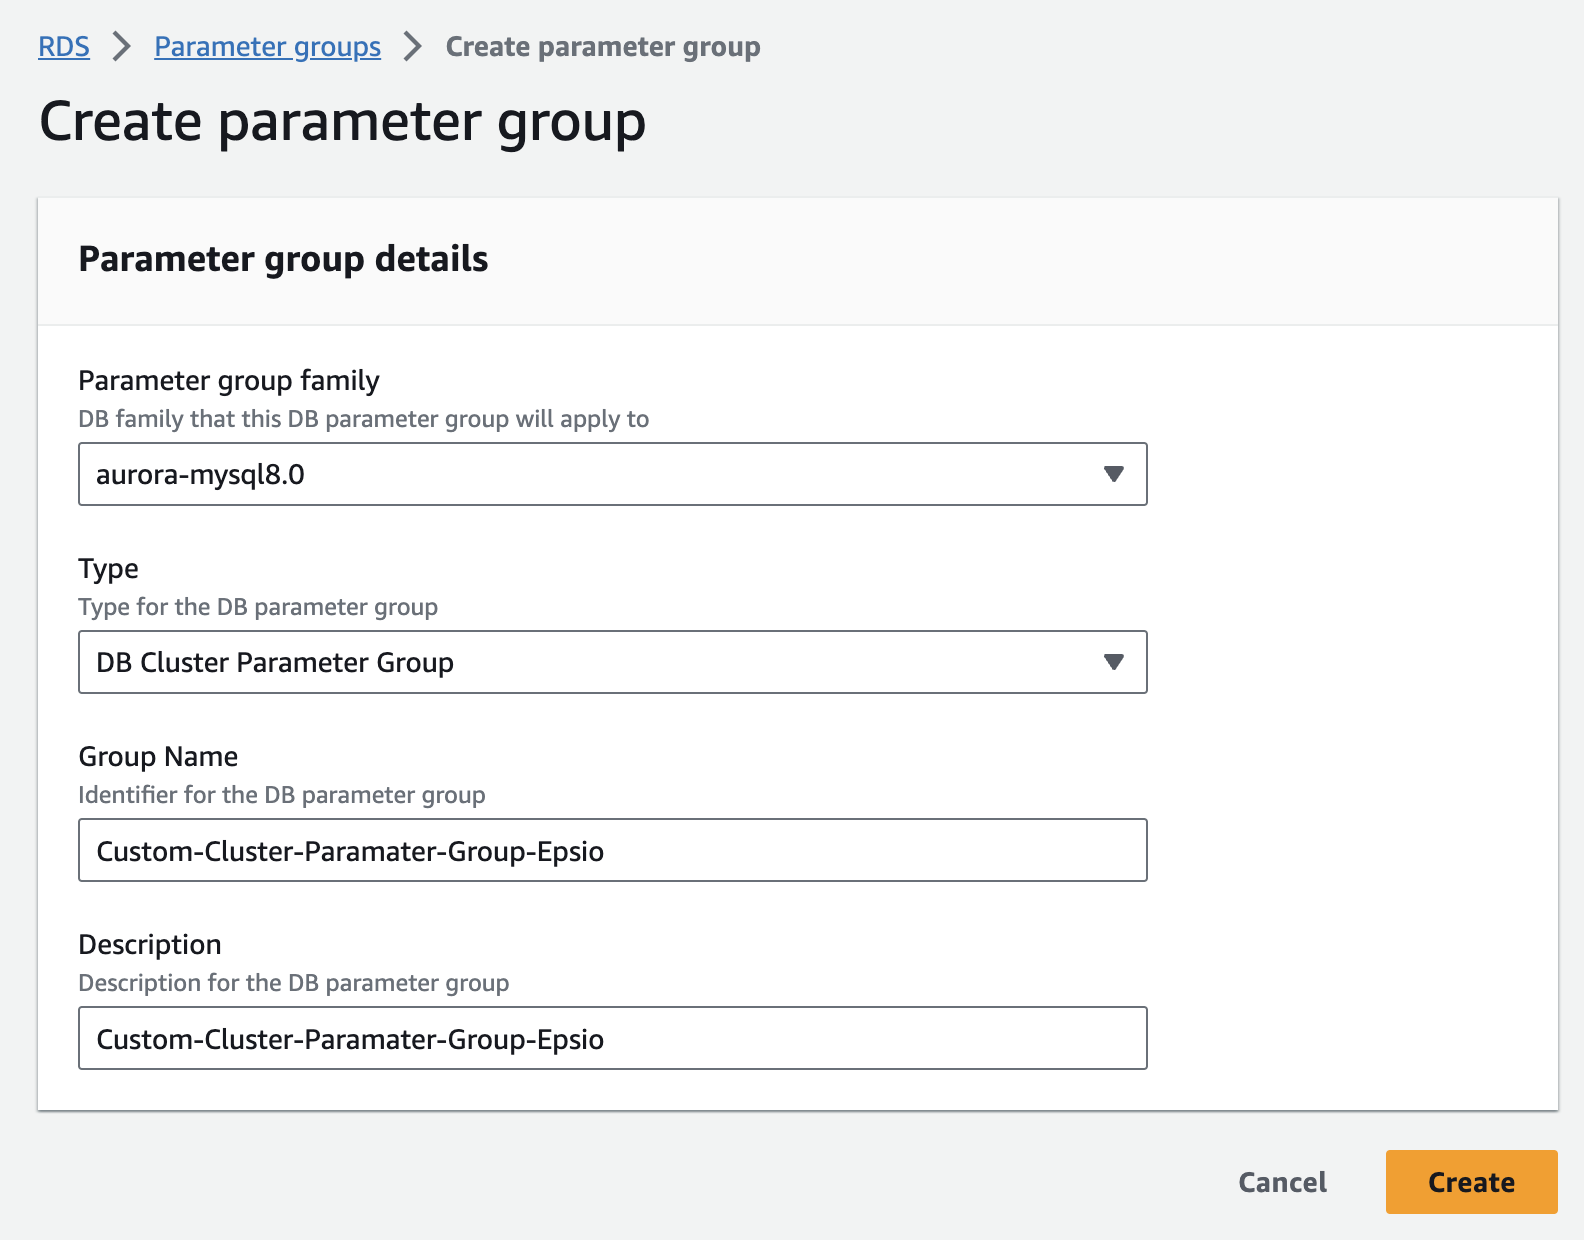
Edit the custom aurora parameter group.
Set binlog_format parameter to "ROW".
Set log_bin_trust_function_creators to 1.
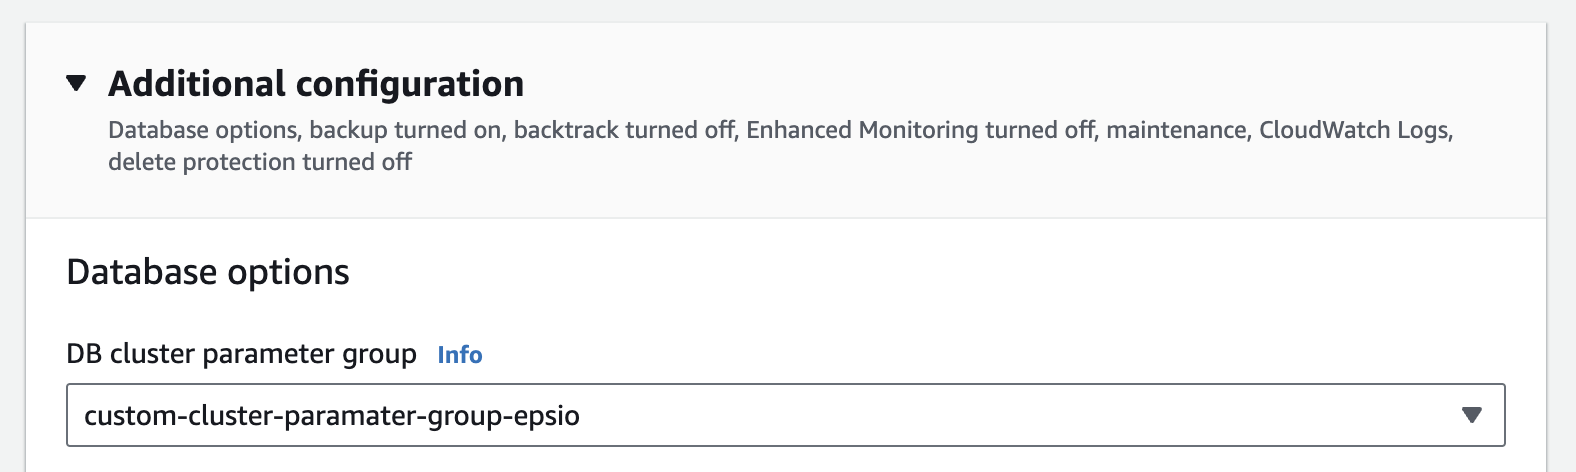
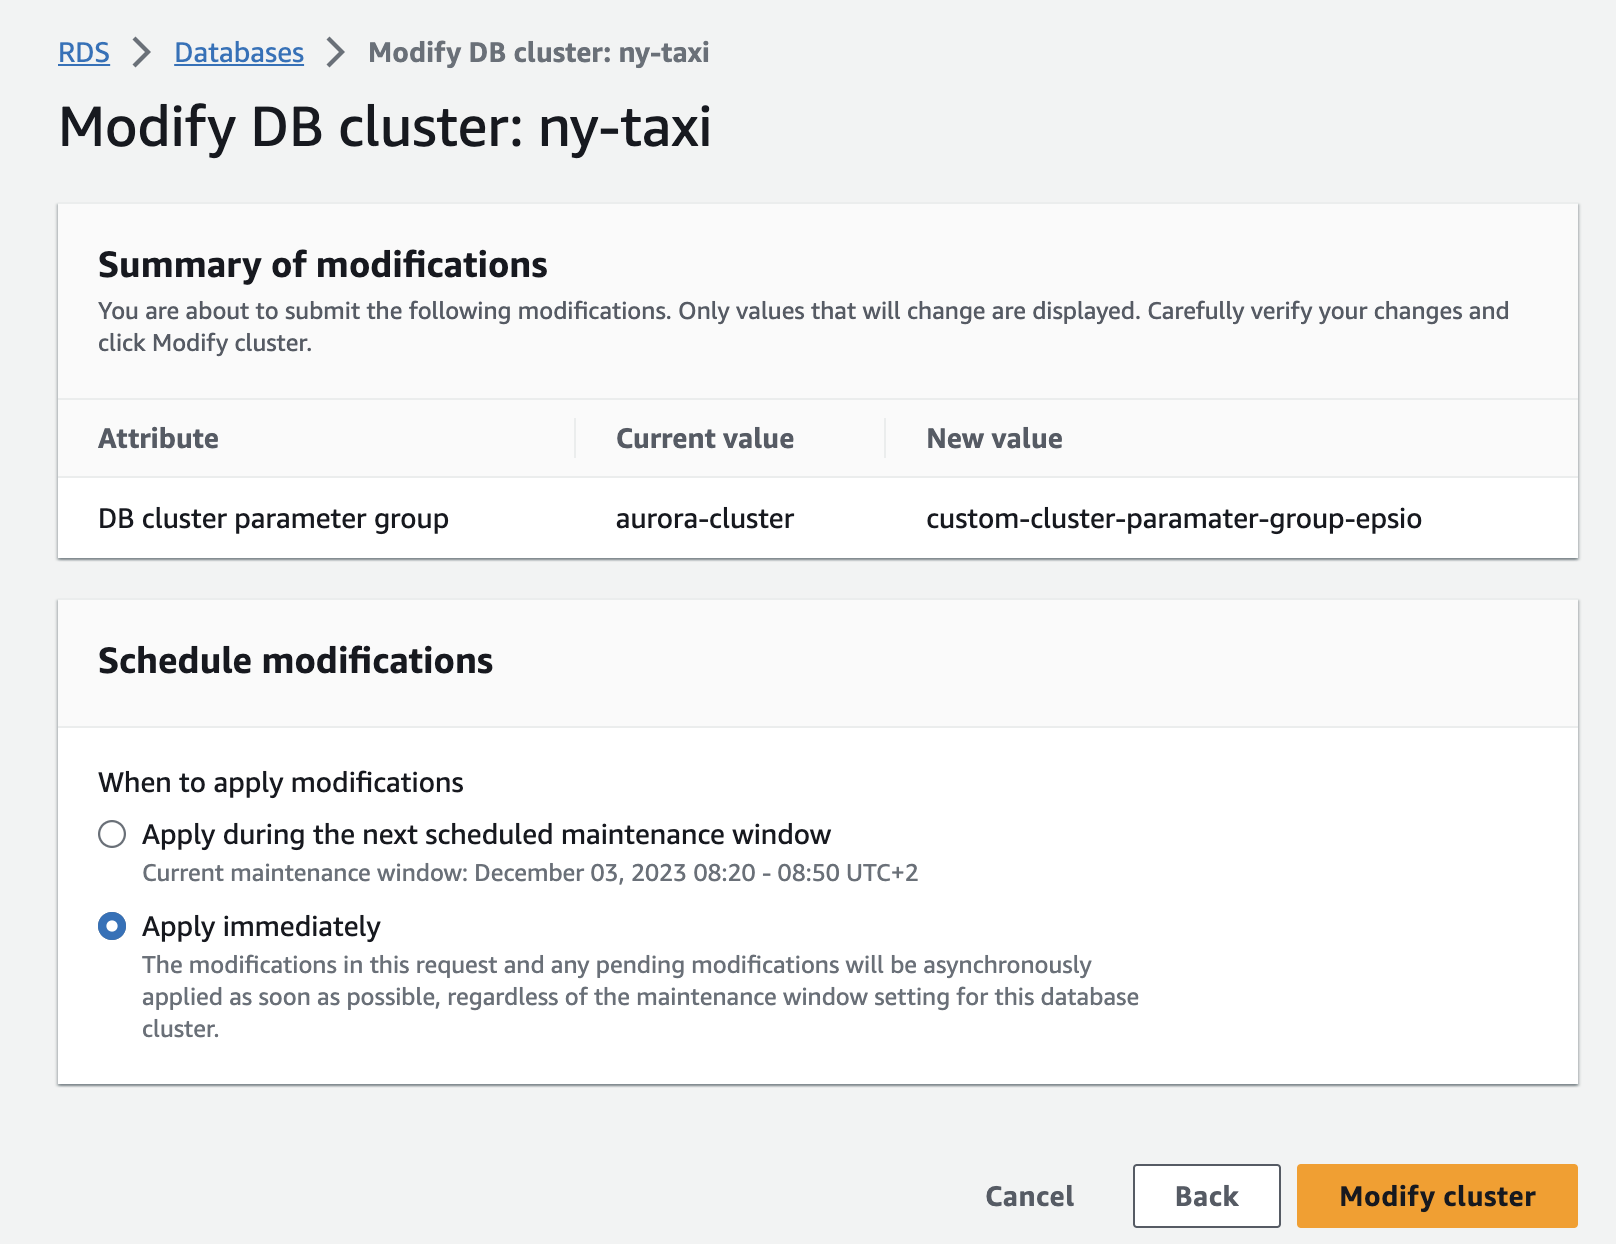
Associate the custom cluster parameter group with your Aurora cluster. Go to the RDS management console, select your cluster and click on the "Modify" button.
In the "Modify DB Cluster" page, select the custom parameter group you created in the previous step.
Make sure you choose "Apply Immediately" to apply the changes immediately.
Wait for the parameter group configuration to change to "Pending reboot" status in your Aurora instance.
The parameter group status can be found in the "Configuration" tab of your Aurora instance. 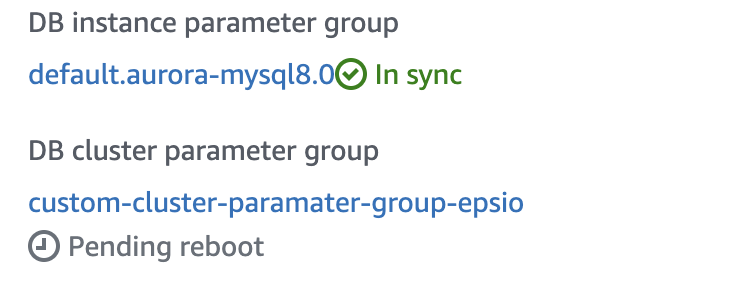
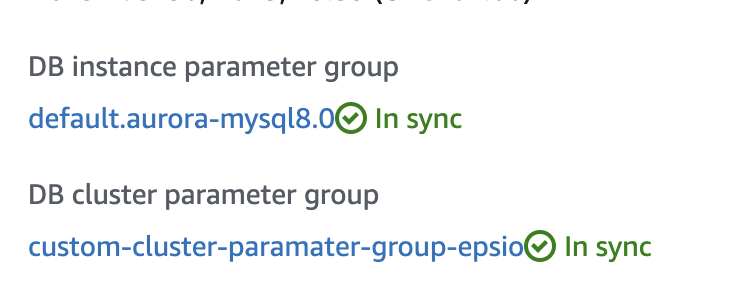
Then, reboot the Aurora instance for the changes to take effect.
You'll know that the changes have taken affect when the status of your Aurora instance cluster parameter group changes to "In Sync".
After the instance reboots, edit the Aurora retention policy:
Verify that all the new configurations are enabled by running the following commands:
Enable binlog:
Edit your mysql conf file and add the following configurations:
server-id = 223344
log_bin = mysql-bin
binlog_format = ROW
binlog_row_image = FULL
binlog_expire_logs_seconds  = 864000
Enable log_bin_trust_function_creators: Run the following command;
Validate configuration: Verify that all the new configurations are enabled by running the following commands:
3. Install Epsio
To install Epsio, run the following commands in your VM:
export DB_HOST='YOUR_DB_HOST'
export DB_NAME='YOUR_DB_NAME'
export EPSIO_USER_PASSWORD='<The password you created in step 1>'

curl https://epsio.storage.googleapis.com/<VERSION>/install.sh | \
    VERSION=<VERSION> TOKEN=<YOUR_TOKEN> bash -s -- \
    --db-type=postgres \
    --db-host=$DB_HOST \
    --db-port=3306 \
    --db-password=$EPSIO_USER_PASSWORD \
    --db-name=$DB_NAME